
Microsoft Word is a word processor that works beyond a text editor. It can help you make customized holiday cards using your images, clip arts or downloaded images. What you need is a little creativity, knowledge about how to use the layout, font, text box and other available features. This article will help you have your hands on all this information to get a perfect holiday card for your loved ones.
Note: If you want to design the envelope then choose it first and determine the paper size by the size of the envelope.
Design Envelopes
As we all know envelopes are not square, they are wider. So, to design one you need to first open a blank Word document and follow the steps below:
- Once the new document is opened go to Layout menu, select Layout and under Orientation select Landscape.

- Next, click on the Size option it will show you list of various options select More Paper Sizes from it.
- In the new window that opens click on the ‘Paper’ tab and under ‘Page Size’ click on the arrow to open the drop-down list. Now scroll and look for preset options for the envelope. They are as follows:
a. B4 (JIS): 10.12 inches wide x 14.33 inches tall
b. B5 (JIS): 7.165 inches wide x 10.12 inches tall
c. Custom size: dimension of your choice


As the most common size of an envelope is 5 x 7 inches we will be creating one of the same size.
4. To do so under Paper size mention select ‘Custom Size’ from the drop-down list and mention 7.25 as width and height as 5.25 inches.

5. Now press the OK button to see envelope of the same size on your MS Word screen.
6. Next click on the Margins tab select ‘Custom Margins’ and in the new window that opens, change it to 0.5 inches on all sides to justify spacing.

7. Once layout settings are done let’s start making the card by adding images to it. From here, head over to Insert menu and click on Pictures.
8. A new window will open to browse for the location of saved image that you wish to use. Select the image and click the Insert button. Resize the image if it doesn’t fit in and to make it look perfect.
9. Next, select the image and click on Layout Options icon that appears on the right. This will open context menu from here under ‘With Text Wrapping’ select ‘Square’ option and select the radio button: Fix Position on Page. You will now see an anchor shaped cursor on left of the image.

10. Now enter the senders address and press Enter key six times.
11. Next before entering recipient’s details press Indent key four times and proceed. If you don’t like the spacing, to change it select the complete address and press the Increase or Decrease Indent button to get desired alignment.
12. Once all is done let’s make add a border and make it look creative. To do so head to ‘Insert’ and from here select ‘Online Pictures’, type image that you want to search and press Enter. Select one that suits your card the best and click Insert.

13. If you find the image big in size you can resize it. From the Layout options select the same settings as we did earlier. Under With Text Wrapping, select the first option and check the radio button: Fix Position on Page.
Creating The Card
Now, when we are done with the envelope it’s time to create the card. As we selected 7.25 x 5.25 inches size for envelope we will set the size to 5 x 7 inches for the card. You can keep the orientation to portrait or landscape whichever suits.
To do this follow the same steps as discussed above and don’t forget to mention the size as 10.5 inches wide x 7 inches tall and click OK.

These settings will create a blank card for you, the page that you see is the front and back of your card and the next page shows the inside pages.
Now, define a margin of 0.5 inch on all sides and start creating the card. Remember anything placed on left will show on back of the card. To write the text, choose font size, color, font style and justify the text if you want.
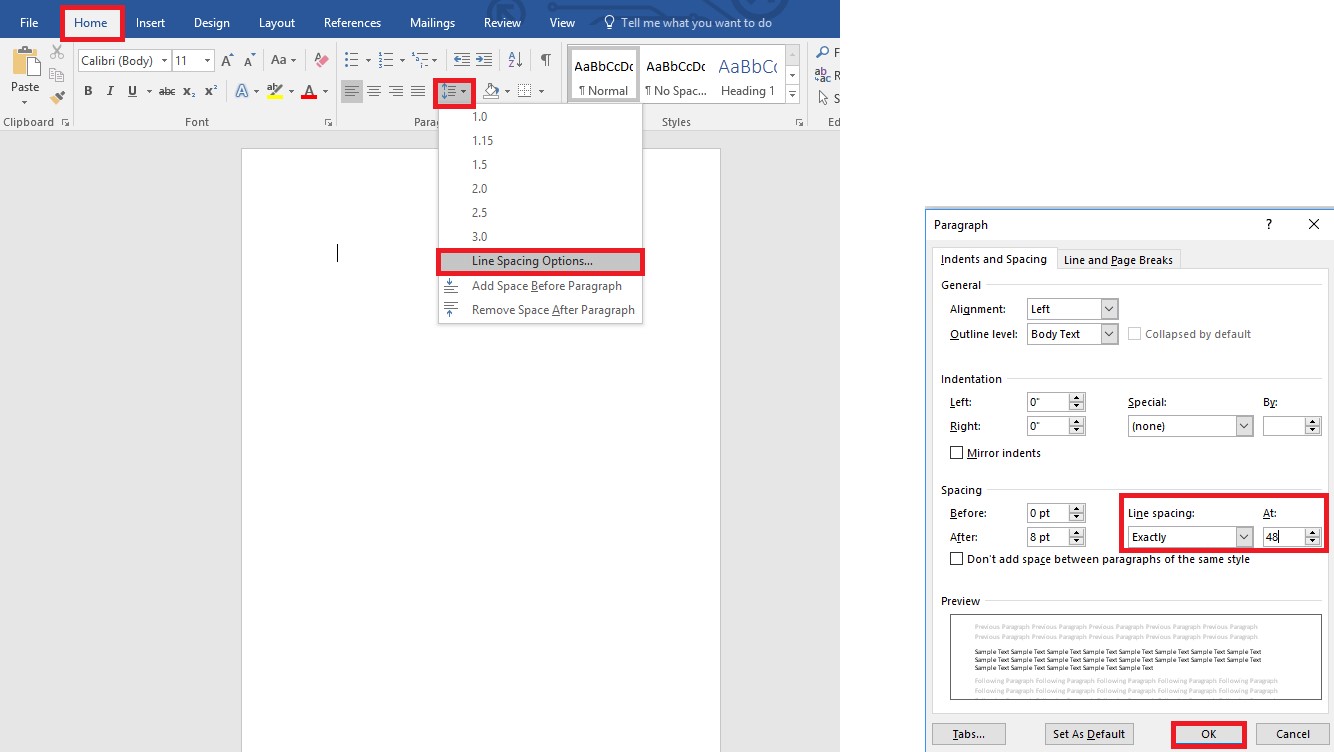
You can choose a font size of 48 as it is perfect for the card you are making. To reduce spacing between text, click on Home tab and from here click on Line and Paragraph spacing. Now select Line Spacing Options and in the new window that opens set the line spacing to ‘Exactly’ and under ‘At’ mention 48
Note: if you want to change the text alignment you can do so by clicking on the down arrow present right to Alignment option.
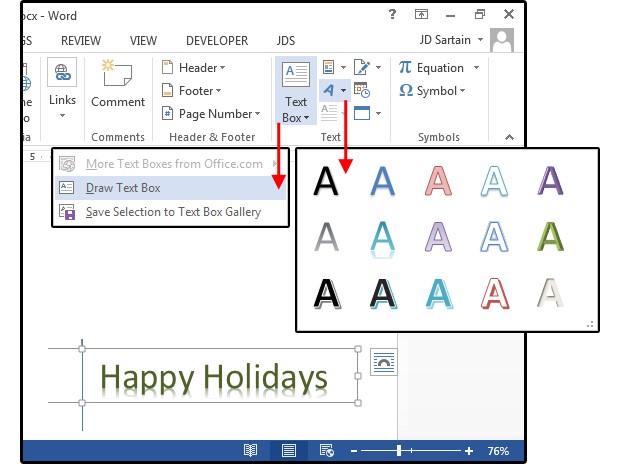
So now we have the exact spacing for the text. Let’s enter the text using Word Art or Text Box to show more of our creativity. To do so, click on Insert menu and select either of the options.

If you select text box you can easily make modification in the font size, style and color. Also, can move its position.
Now that you know from where to add the text chose the option as per your convenience and use the edit features to make changes in the text color, size, font and you can also add special effects to it.
When finished, print the card and you are all set to send it over to your loved ones.

 Subscribe Now & Never Miss The Latest Tech Updates!