Apple gave a glimpse of iOS 12 at WWDC 2018 and showed its attempt to make iOS flawless meanwhile adding more features. Apple recently released iOS 12 beta version for developers. The final version is set to release in September this year.
If you have installed iOS 12 to your iPhone and don’t like it due to bugs, you can downgrade your system update to 11.4. To do that, you need to use iTunes on your Windows and macOS.
In this post, we have discussed how to downgrade iOS 12 to 11.4 on your iPhone.
Note: You can downgrade iOS 12 to 11.4 with iTunes, only if you have archived iOS 11 backup.
Well, in case you haven’t backed up the iOS, you can still downgrade. Follow these steps to do so:
Step 1: First step would be to Deactivate ‘Find My iPhone’
Step 2: Connect your iPhone to iTunes
Step 3: Recovery Mode
Step 4: Restore Your iPhone
Step 5: Restore Backup On Your iPhone
Step 1: Deactivate ‘Find My iPhone’:
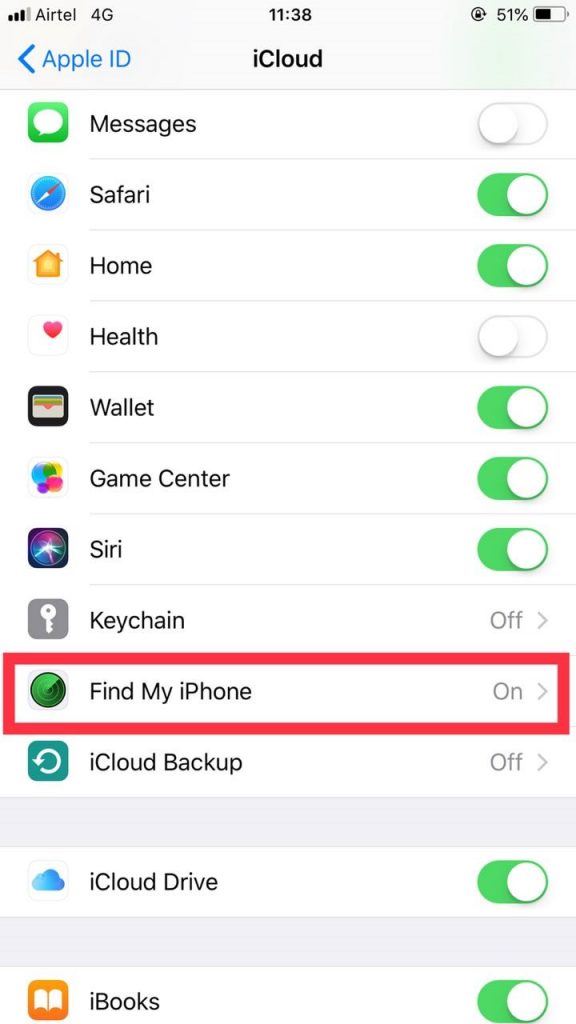
In order to downgrade iOS 12 to 11.4 on your iPhone, you need to deactivate Find My iPhone. Well, you can do this, when prompted later in the process as well. So, follow the steps:
- Go to Settings from the home page.
- Tap on device from the top of the Settings page.


- Locate and tap on iCloud.
- Scroll the following page and scroll to locate ‘Find My iPhone’ and deactivate it. To complete the action, you will be asked to input Apple ID password and it is done.

Step 2: Get Your iPhone connected to iTunes:

- Once you have done with the first step, connect your iPhone to your Windows or Mac computer. Launch iTunes on your computer or it will come up on its own.
Note: Before performing the steps, check that you have the latest version of iTunes installed.
To check whether you are connected to iTunes, look for an iPhone’s icon at the top left-hand side of the window.
Step 3: Recovery Mode
Another thing to prep for downgrading your iPhone to iOS 11.4, you need to put it in recovery mode. Recovery mode allows you to restore the iPhone to a default build of iOS. Getting to recovery mode in every model of iPhone is different, so let’s discuss the popular and contemporary models:
You need to do this, while your iPhone is connected to your Windows or Mac.
- iPhone 6 S or before: Press both Home and Sleep button together to get the iTunes screen
- iPhone 7 and 7 Plus: Press Volume button along with Sleep/Wake simultaneously until the “iTunes” screen comes up
- iPhone 8, 8 Plus and iPhone X: Press Volume Up button and release. Now press Volume down and release the button. Now press Side button until iTunes screen comes up.
Step 4: Restore It:

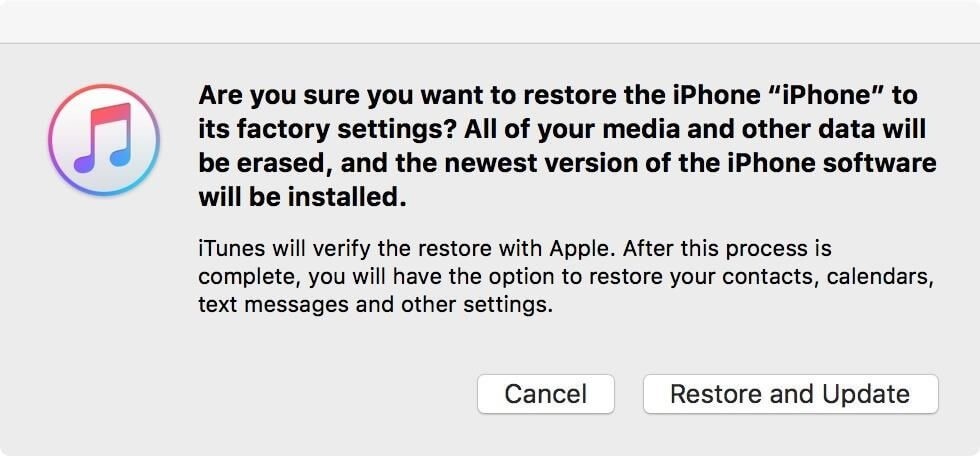
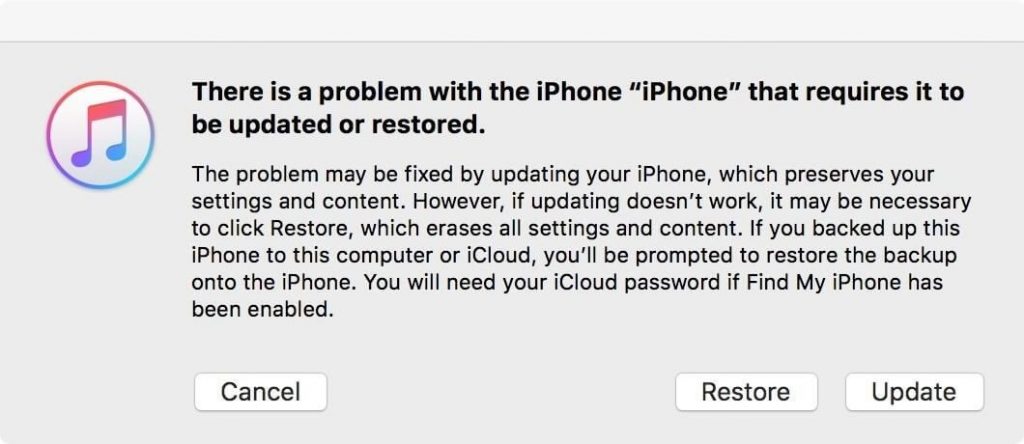
Once you are through with Recovery, which means recovery mode is now activated. You will get a prompt on iTunes, “There is a problem with the iPhone that requires it to be updated or restored.” Click Restore. Now click “Restore and Update” from the upcoming page. After this action, your iPhone will start the process to downgrade from iOS 12 to iOS 11.4. You might be asked to input your credentials to Apple ID to complete. Once done, you will see a blank screen with Apple logo on it.
Step 5: Restore Backup On Your iPhone:

As iPhone is set to default settings, you need to customize it and get the files and other data back. Now the iPhone will walk you through initial setup instructions. Select “Set Up as New iPhone,” However To get the data back, click “Restore from iTunes Backup.”
Don’t disconnect your iPhone from your computer while getting back your data. Select your iPhone on the app and click ‘Restore Backup’, choose your back up file from the list and click Restore.’
You need to be patient while working on downgrading the iOS as you don’t want to miss anything. It will restart and always remember to keep it connected to iTunes during the process.
So, this is how you can downgrade iOS 12 to iOS 11.4. Try it if you want your old iOS 11.4 back.


 Subscribe Now & Never Miss The Latest Tech Updates!