Deleting a folder or file directly from Windows 11 is pretty easy, but occasionally you might run into a folder or file you can’t delete. But sometimes, you’ll discover that the conventional method won’t work to delete a certain file or folder. You typically receive a “File in Use” warning when you can’t remove a file. Even if this could be a significant issue, one of our remedies should help you resolve it. Don’t panic; there are several ways to force delete a file on Windows 11.
Read Also: How To Change the Size & Orientation of Taskbar in Windows 11
Force Delete a File on Windows 11
If you’ve used a computer for any length of time, you’ve probably discovered that some folders or files can be tricky to get rid of. They often have hidden subsidiary files and associated processes so they won’t go away easily. There are several ways to force delete a folder or file on Windows, but don’t worry if you find yourself in this situation – it happens to the best of us!
Read Also: 6 Ways to Empty the Recycle Bin in Windows 11
Why Windows is Preventing You to Delete a Folder or File
However, before you immediately attempt to delete the files, let’s look at some possible causes for why Windows is preventing you from doing so. Check out the following reasons for further information.
- Folder or File is corrupted.
- The Recycle Bin is full.
- Another process or application currently uses that folder or file.
- Folder or file is read-only.
- It can be a system folder or file you are trying to delete.
Now that you’ve become aware of the problem’s possible causes let’s talk about how to force delete a folder on Windows 11.
Read Also: How To Fix Wi-Fi Keeps Disconnecting On Windows 11
How to Force Delete a File on Windows 11
Method 1: By Using Command Prompt
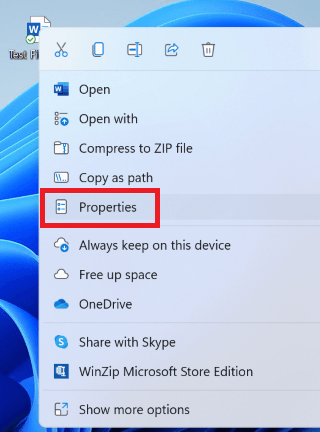
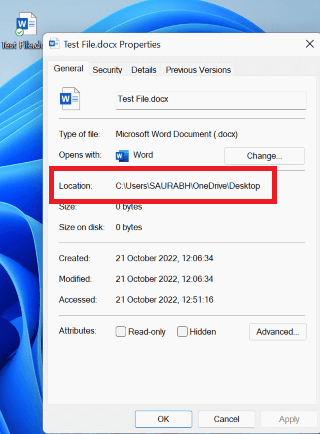
Before opening Command Prompt, you will need to find out the Path/Location of the file/ folder that you want to delete. To do so, follow the steps below:
- Head over to the folder/file and right-click on it. From the context menu, choose “Properties.”
- Now copy or pen down the address in front of “Location.”
After doing this, let’s get started with the Command Prompt.
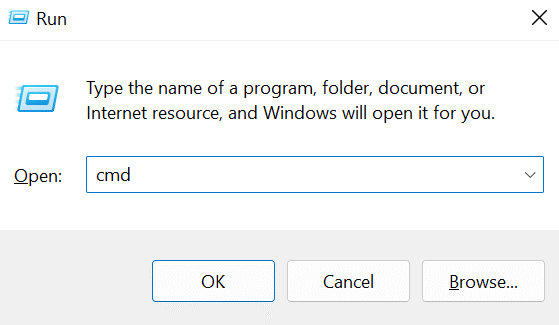
- Press the “Windows” key with the key “R” to open the “Run” dialogue box.
- Type “cmd” and press the “Enter” key.
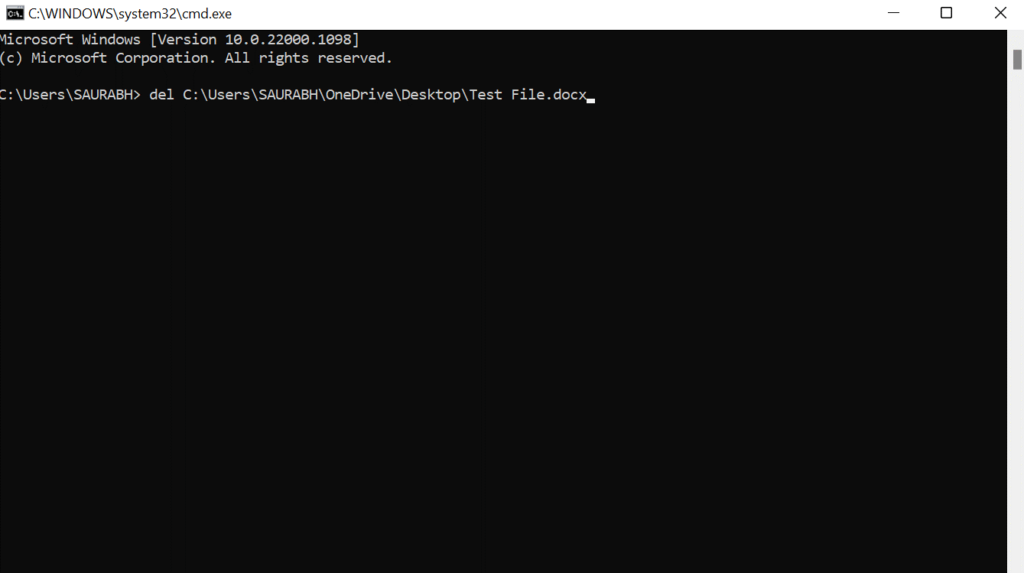
- Now enter the following code and hit the enter key to delete it: “
del <filepath>\<filename.extension>”
- You can also use this alternative command to force delete a folder on Windows 11. “
RD /S /Q filepath>\<filename.extension”
Note: Before executing the command, replace filepath with the address you just copied or wrote down and replace ‘filename.extension’ with the actual file/folder name. Also, don’t use “< or >” either.
Method 2 : Using Shift Key
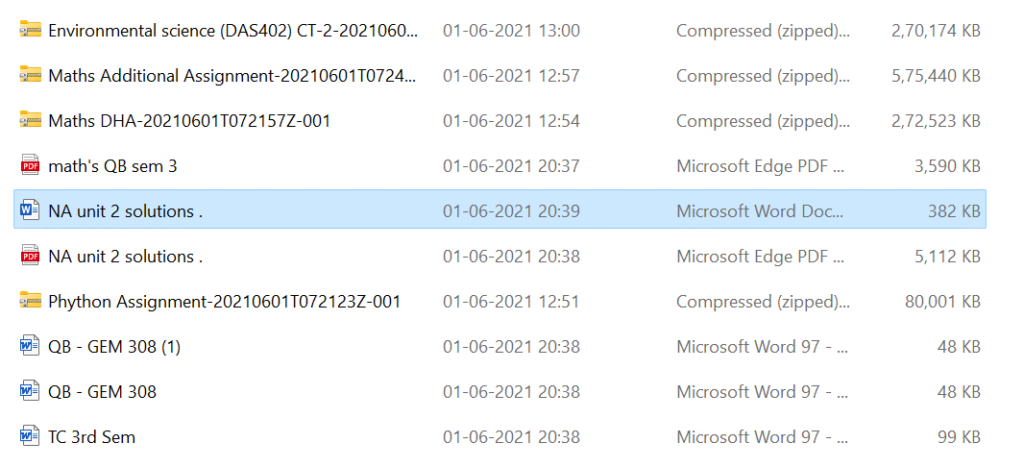
If your computer’s Recycle Bin is full, you cannot delete the file. To avoid using the Recycle bin, press the Shift key while deleting the file or folder.
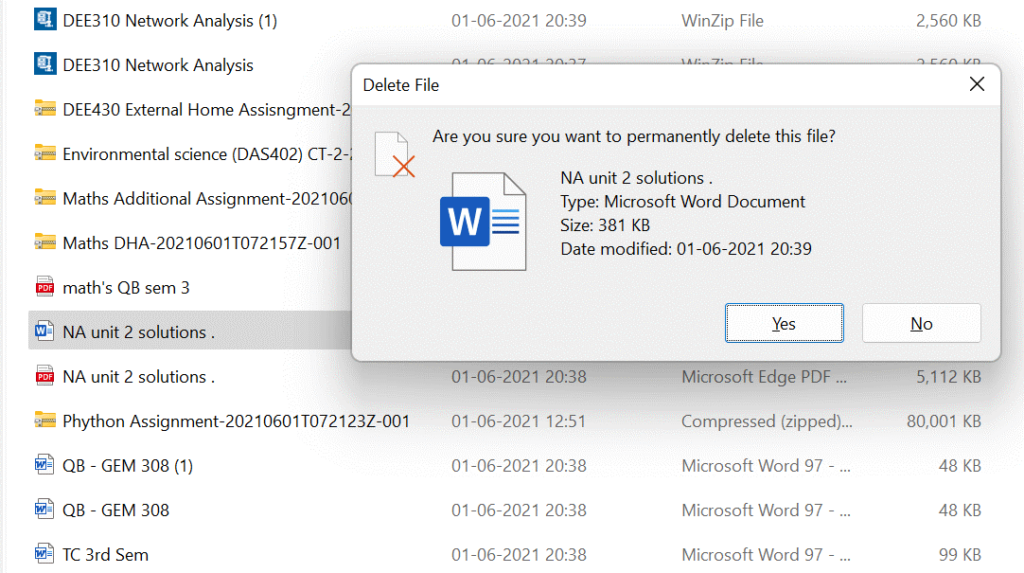
- To delete a folder or file, click on a folder/file to select it and then press the “Shift+Del” keys together.
- A pop-up window will appear in front of you. Choose “Yes.”
Read Also: How To Fix Slow File Explorer In Windows 11
Method 3: Boot Your PC Into Safe Mode
Safe mode is a unique state of Windows operation where your computer only boots with the bare minimum of drivers and files. You can use safe mode to check or fix the device if your computer displays some irrelevant issue. You can forcefully remove files with the aid of this mode. To do so follow the steps:
- Press the “Windows” key with the key “I” to open Windows settings.
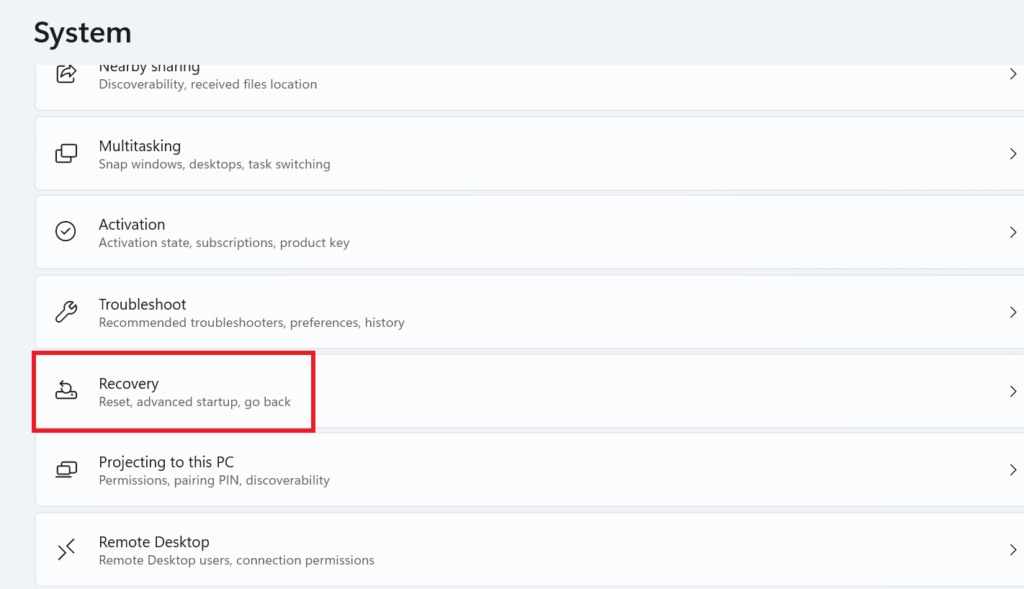
- On the right side of the page, under the “System” tab scroll down and click on the “Recovery” option.
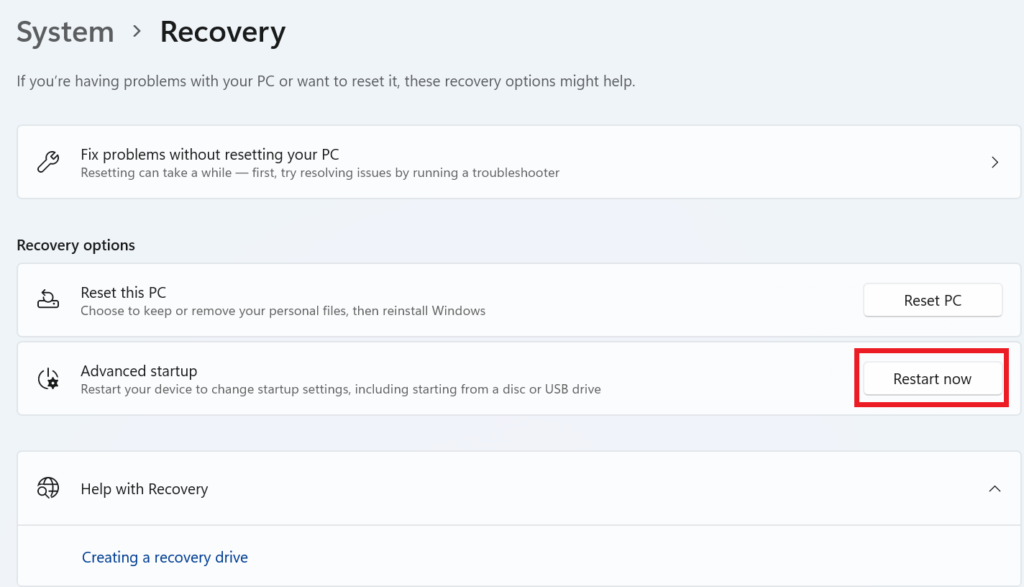
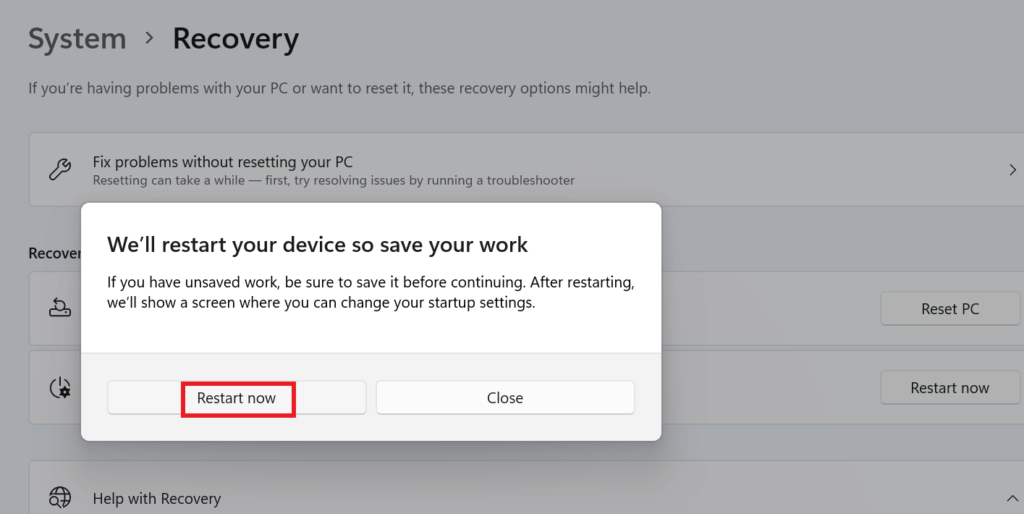
- Now click on the “Restart now” button in front of the “Advanced startup.”
- A pop-up window will appear, choose “Restart now.”
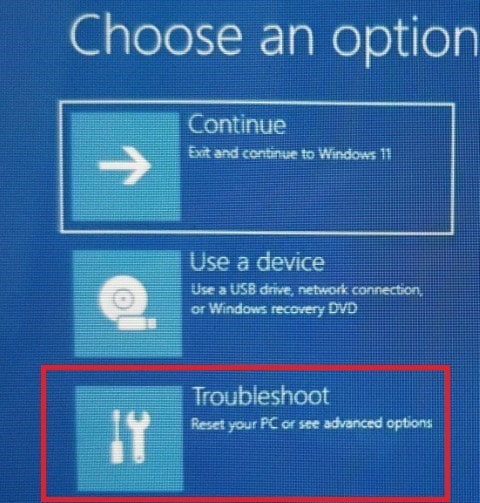
- Now hit the “Troubleshoot” option.
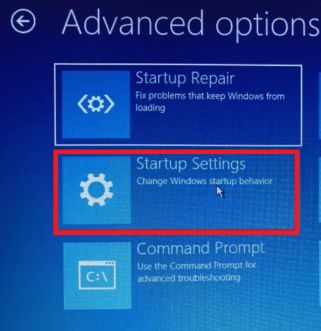
- On the following screen click on the “Advanced option” tile.
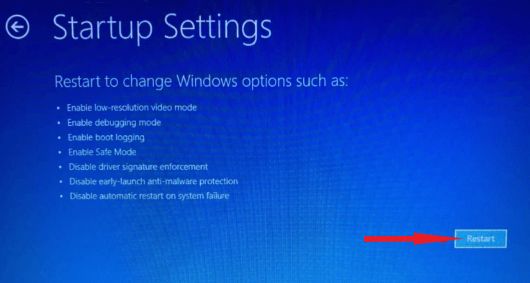
- Now click on the “Startup Settings” tile.
- On the startup settings page choose the “Restart” button from the bottom right corner of the screen.
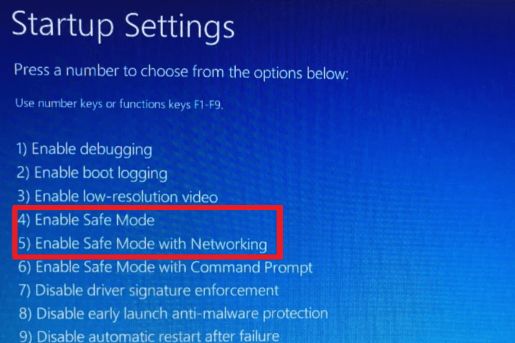
- After restarting, choose an option from the list of options. We would suggest you choose either no. 4 or 5.
- Press 4 or 5 on your keyboard to boot your PC into safe mode.
Your computer will turn on and enter safe mode. Now try erasing your folder or file; you should now be able to do it quickly. You can exit the safe mode by restarting Windows after you’re finished.
Read Also: How To Fix Private Internet Access Won’t Connect In Windows 11/10
To Wrap This Up
That is how you can easily force delete a file on Windows 11. Using CMD is the simplest method to force delete a folder on Windows 11. All you need is the folder’s or file’s path to delete it. Give these methods a try and let us know which one worked for you in the comments below. Also, don’t forget to share it with your friends and family. Follow us on social media – Facebook, Instagram and YouTube.


 Subscribe Now & Never Miss The Latest Tech Updates!