
Cannot access shared folders on Windows 11? Well, yes, it can be pretty annoying. Although, don’t worry. We’ve got you covered. By making a few quick changes in your device’s settings, you can easily retain shared folders on Windows 11.
For those of you who are not aware of the concept of shared folders, here’s a little summary. Shared folders can be shared across a common network so that you can easily access file resources on multiple devices. Once you create a shared folder, all the files and subfolders included in the folder can be shared across the network. So, yes, not being able to access a shared folder can be frustrating as it may hamper your workflow.
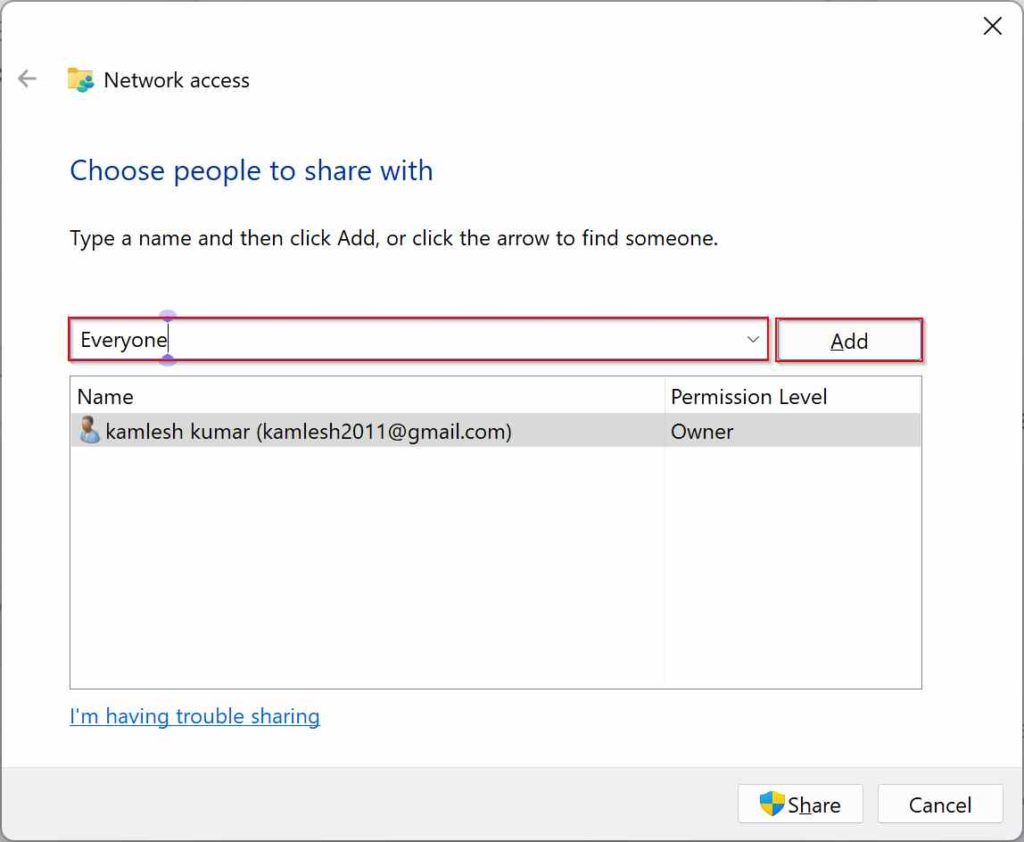
Image source: Gear Up Windows
There may be a couple of reasons why shared folders won’t work on your device. Some of the most common reasons include misconfigured network settings, incorrect drive settings, limited folder access, permissions, etc.
Let’s get started and see how to fix the “Shared folder not working” issue on Windows 11.
Also read: Steps To View Shared Files & Folders in Windows 10
How to Fix Cannot access shared folder error on Windows 11
Solution #1: Configure Network Sharing Settings
Misconfigured network settings are one of the most common reasons why you may be able to access shared folders on Windows 11. Here’s what you need to do:
Launch the File Explorer app on your Windows 11 PC or laptop.
Right-click on the shared folder and then select “Properties”.
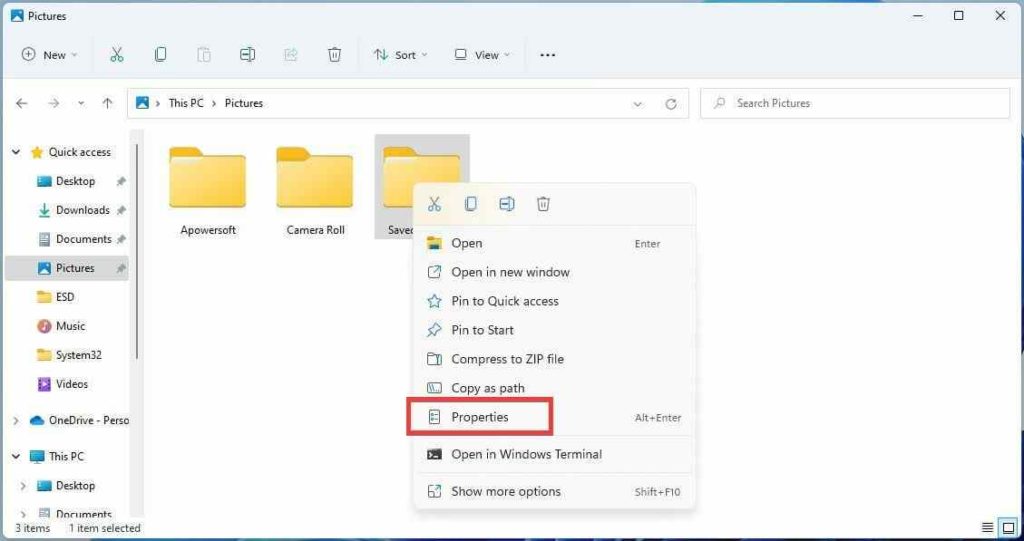
In the Properties window, switch to the “Sharing” tab.
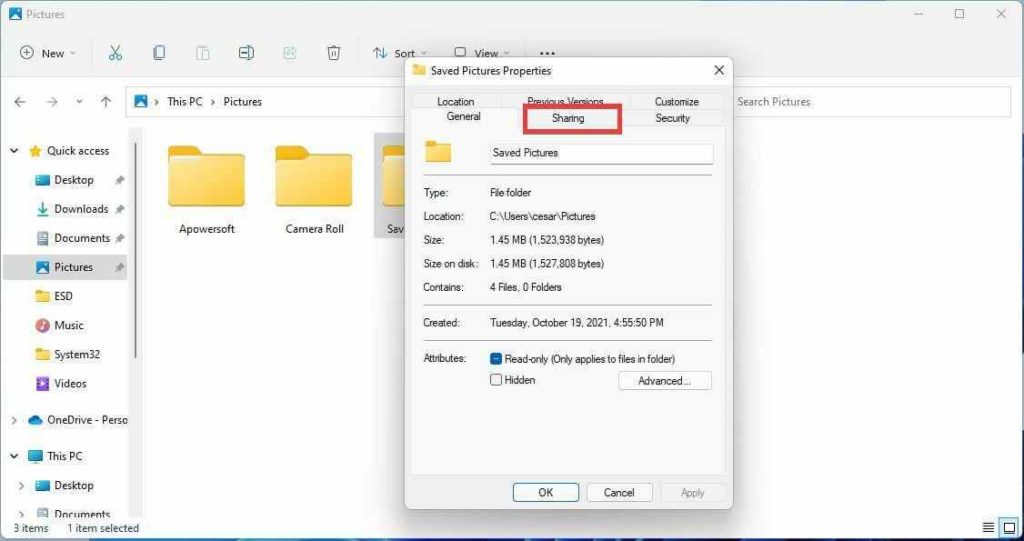
Tap on the “Advanced Sharing” button.
Check on the “Share this folder” option in case it was unchecked by default.
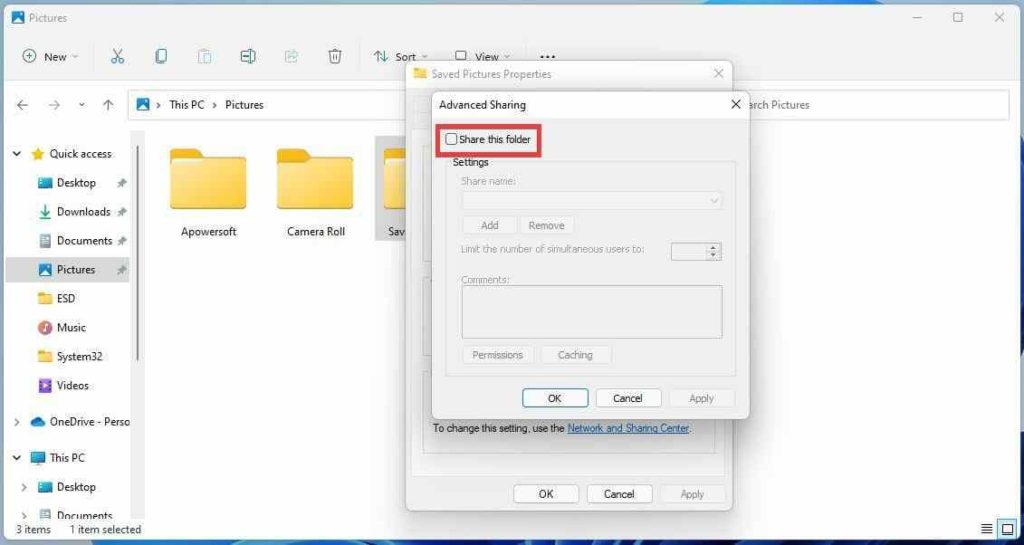
Hit on the OK and Apply buttons to save your recent changes.
If you want, you can also provide a share name for the folder. Also, there’s even an option to limit the number of simultaneous users who can access the shared folder. Customize the shared folder settings as per your preference and then save your settings.

The next step is to set the permissions. Tap on the “Permissions” button.
Pick “Everyone” from the list and then customize the permissions settings that you want to offer by choosing between Full Control, Change, and Read.
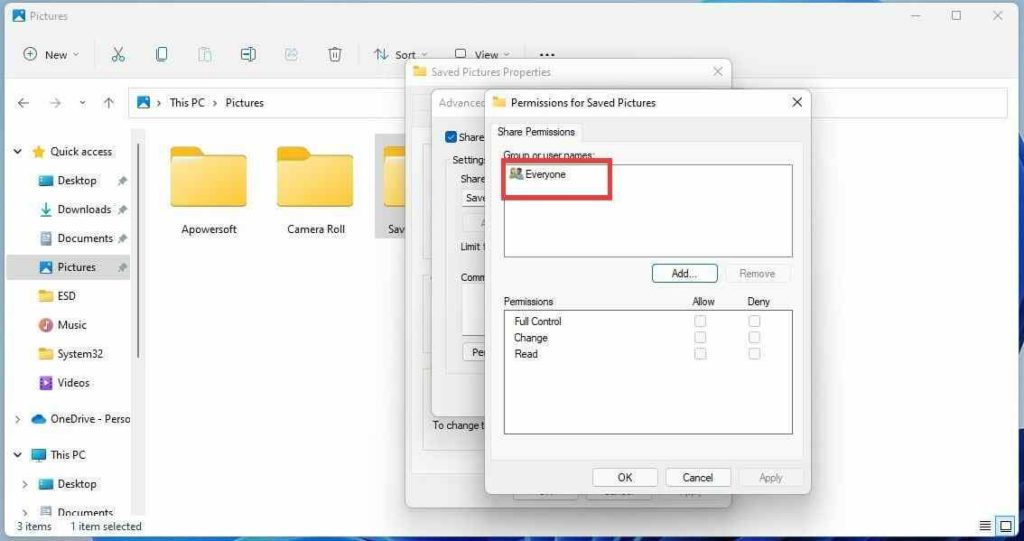
Hit on the Apply button to save the recently made changes.
So, yes, by following the above-listed steps, you can reconfigure the network sharing settings of the shared folder to start from scratch.
Also read: How To Password Protect A Zip File and Folder
Solution #2: Allow Security Permissions
The next workaround to fix the “Cannot access shared folder on Windows 11” issue is by altering the security permission settings of the shared folder. Follow these quick steps to get started:
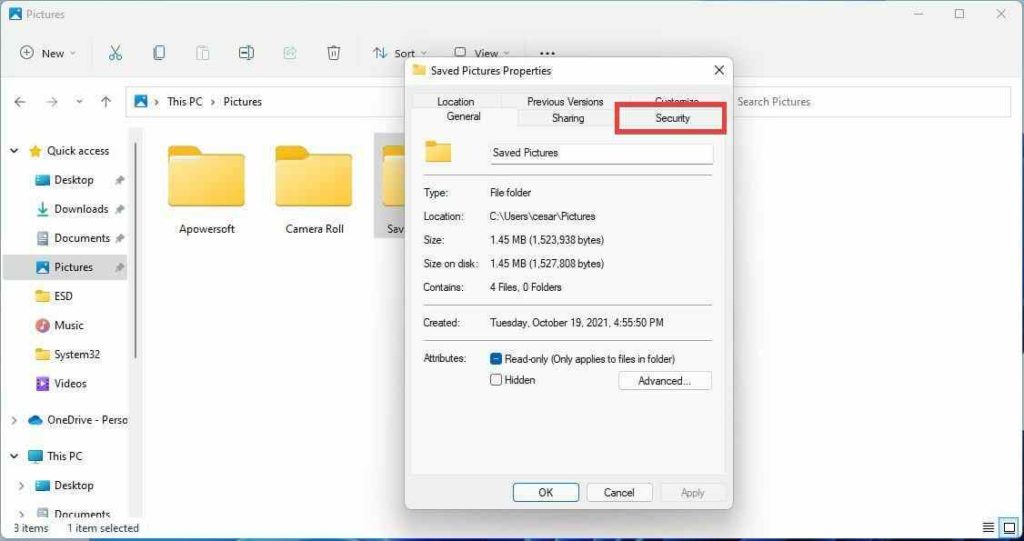
Open File Explorer, select the “Shared Folder”, right-click on it and select “Properties”.
In the Properties window, switch to the “Security” tab. Tap on the “Edit” button.
Tap on “Add”.
In the “Select Users or Groups” window, hit on “Advanced”.
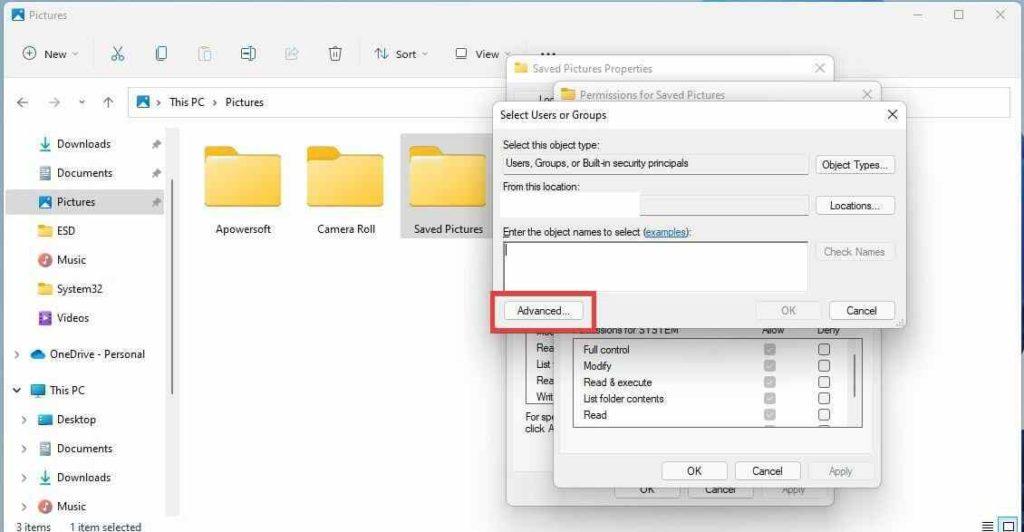
In the new window that appears on the screen, hit the “Find Now” button placed at the right.
A list of search results will be displayed on the window, scroll down through the list and select “Everyone”.
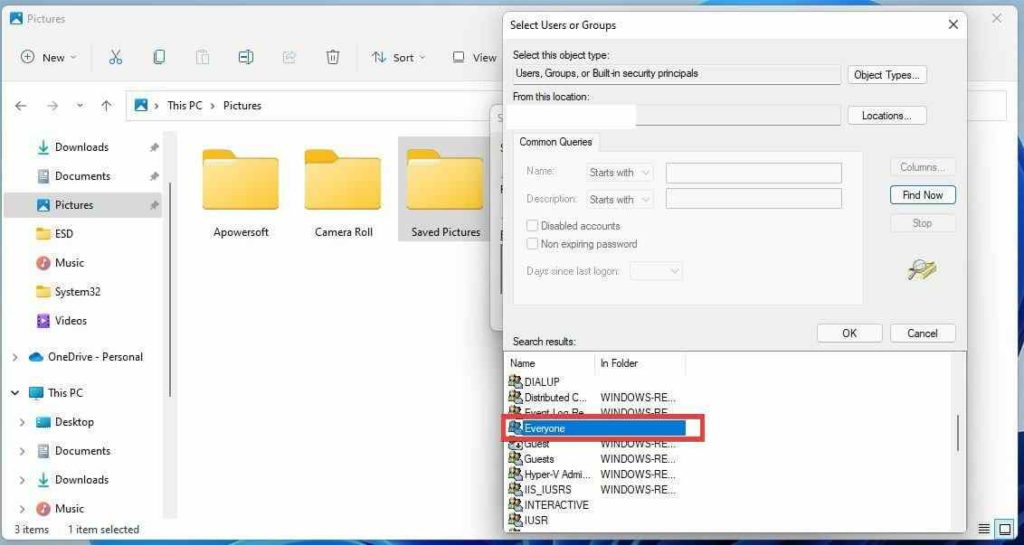
Hit on “OK”.
You will now be redirected to the previous window, tap on OK.
In the “Permissions for shared folder” properties window, you will now see a new entry named “Everyone”.
Select “Everyone” from the list and then check on all the boxes placed in the Permissions window.
Hit on the OK and Apply buttons to save changes.
Also read: Windows 10 Can’t Map the Network Drive? Here’s the Fix!
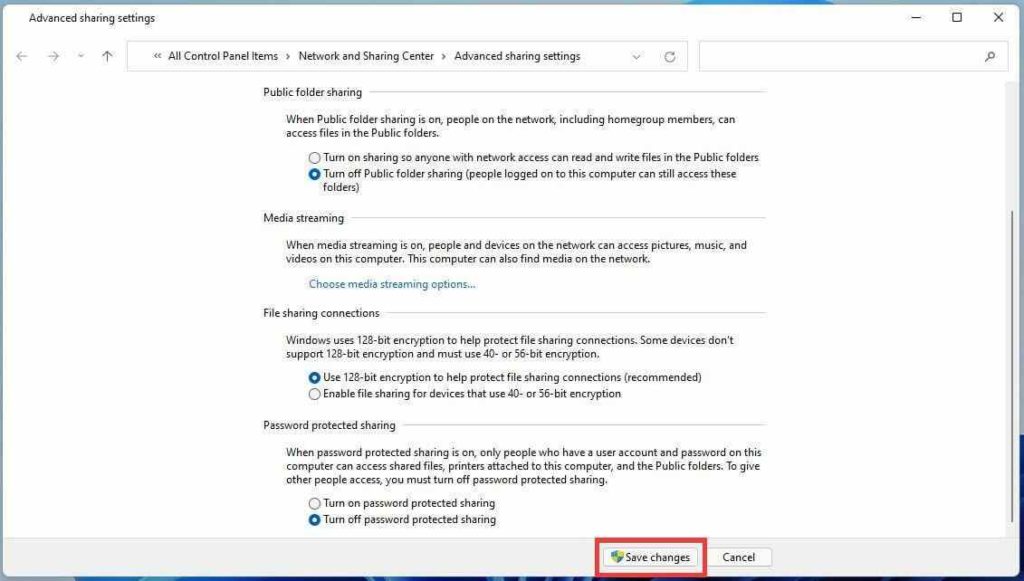
Solution #3: Turn OFF Password Protected Folder Sharing
If the password-protected setting is enabled for a shared folder, it may sometimes interfere with the network sharing settings. To turn off password protected settings, here’s what you need to do:
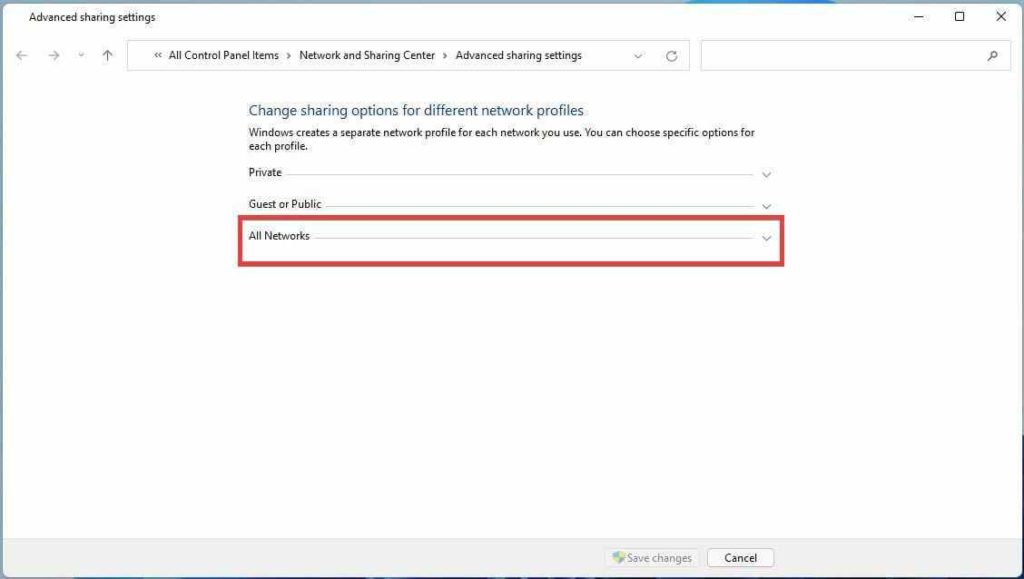
Tap on the search icon placed on the Taskbar, type “Manage Advanced Sharing Settings” and hit Enter.

Tap on “All Networks”.
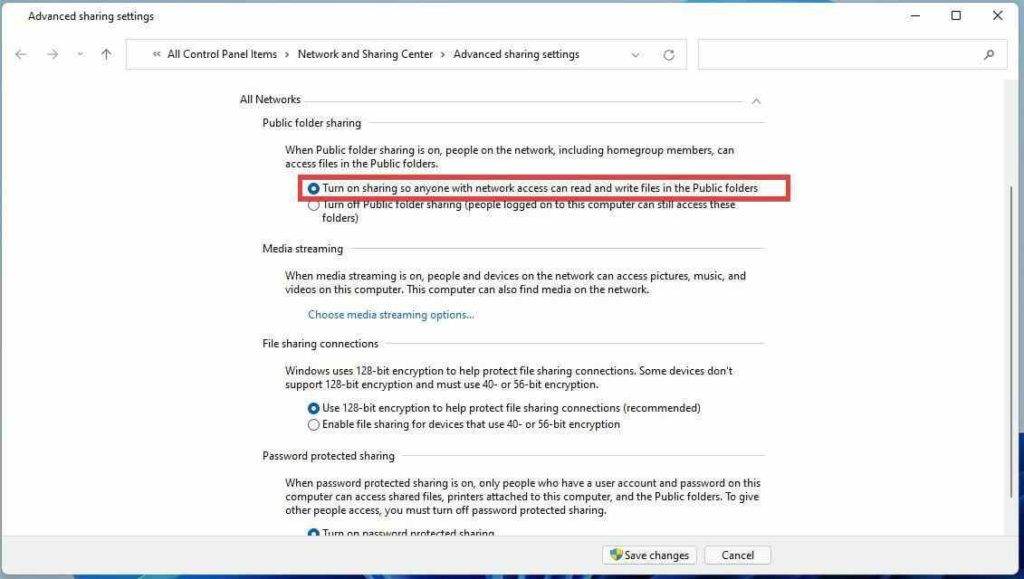
First, enable the “Turn ON sharing so anyone with network access can read or write in the Public folders” option.
Scroll down and now select the “Turn off password protected sharing” option.
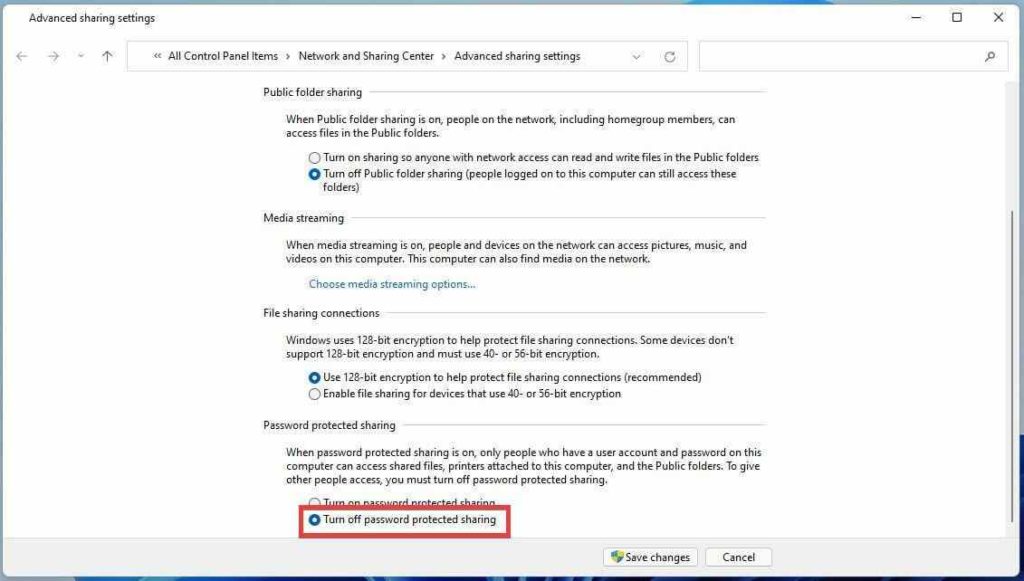
Hit on the “Save Changes” button after making these changes.
Also read: Mac Smart Folders: All You Need to Know
Conclusion
Here were a few simple methods that you can try to fix the “Cannot access shared folders on Windows 11” issue. You can use any of the above-listed solutions to gain access to shared folders while bypassing common errors, bugs, and glitches.
Was this post helpful? Feel free to share your thoughts in the comments section!Follow us on social media –Facebook, Instagram and YouTube.

 Subscribe Now & Never Miss The Latest Tech Updates!