Although Windows 11 has a lot of features and elements, not all are installed by default. And the ones that you cannot see on your new Windows 11, are features referred to as Windows “Optional features.” The default setting for the optional features disables them because most of us don’t use or even need these, and they are primarily designed for developers and programmers. We’ll talk about these optional features in more detail in this post.
So without further ado, let’s get started.
Read Also: New Windows 11 22H2 Features You Can Look Forward To
What are Windows 11 Optional Features
With each new iteration of Windows OS from Microsoft, new features are added to enhance the user experience. There are several significant new features in Windows 11 under the tab of optional features. Thanks to these Windows 11 new features, users can customize their PCs and take advantage of experiences they can control.
Few people are aware of the majority of these features because they are mostly disguised. They increase overall productivity and multitasking, and they are also easy to activate. The majority of these features are intended for firms, IT companies, server administrators, developers, and programmers who may want more functionality to accomplish their goals.
Read Also: 2 Ways To Repair Programs And Apps In Windows 11
With that said now let’s take a look at how you can access them.
How to Access Windows 11’s Optional Features
You can install or access these optional features in three simple ways. So let us take a look at these methods one by one.
1. Via Settings App
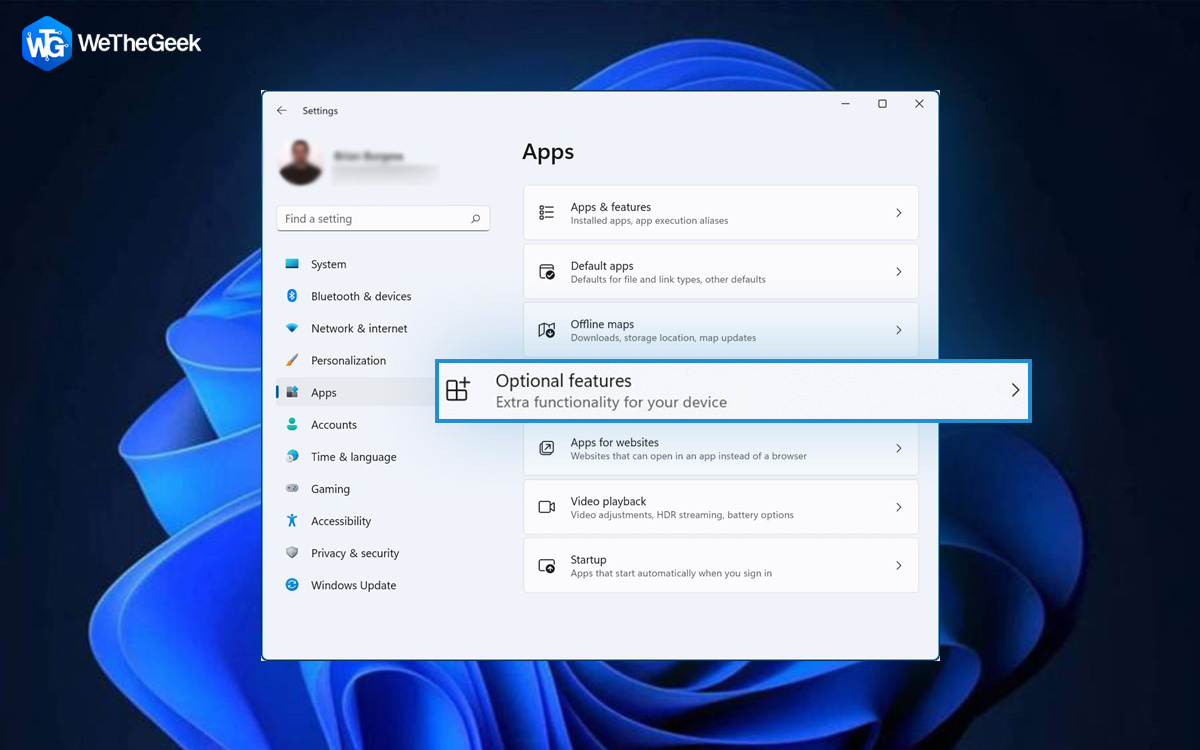
- Press the “Windows” key with the key “I” to open Windows “Settings” menu.
- Click the “Apps” tab from the Settings app’s left pane, then select “Optional features” from the right side of the window.

- On the Optional features, page click on the “View features” option right in front of “Add an optional feature.”
- Now you will see a list of Windows 11 optional features. Look down the whole list and if you want to install a feature or features, select them by clicking on the checkbox ☑ next to them. And click on “Next.”
- On the following page select “Install.”
- The optional features you’ve chosen will indeed be downloaded and set up.


Read Also: How To Rename Your Windows 11 PC?
2. Install Windows Optional Features using Control Panel
- Hit the 🔍 from the “Taskbar” type “Control panel” in the search bar and hit the “Enter” key.
- Look for and tap on “Program and Features.”
- Here from the top right side of the page select “Turn Windows features on or off.”
- A pop-up window will appear in front of you and here you will find additional optional features. Click “OK” after selecting the features you want to install.
- Choose the “Let Windows Update download the files for you” option if asked.
- Some features need to be restarted to take effect. So, to complete installing the optional feature(s), click the “Restart now” button if you are prompted to do so.


3. Install Windows Optional Features using DISM Command
- Hit the 🔍 from the “Taskbar” type “Command prompt” in the search bar and choose the “Run as administrator” option to open it.
- Now type the following command and hit the “Enter” key: DISM /Online /Get-Capabilities
- The aforementioned program will provide a list of all Windows 11’s optional features along with their installation progress. (Installed or Not Present)
- If it is hard to find the features and install them in this format. Type this command and hit the “Enter” key to get all this data in the “Table” form: DISM /Online /Get-Capabilities /Format: Table
- Now copy the feature’s name/Capability Identity you want to install when you’ve located it. For example, the capability name for wireless display connection is “App.WirelessDisplay.Connect~~~~0.0.1.0”
- Now type this command and hit the “Enter” key to add this Windows 11 optional feature to your PC: DISM /Online /Add-Capability /CapabilityName: Feature_Name
- Don’t forget to replace the Feature_Name with the actual capability name. In our case it is App.WirelessDisplay.Connect~~~~0.0.1.0
- To apply the modifications, restart your computer after the installation is complete.


In case, you want to delete on uninstall an Optional feature you can do it via the Windows settings app.
Read Also: How To Fix Microsoft Teams Crashing On Windows PC
How to Uninstall Optional Features from Windows 11
- Press the “Windows” key with the key “I” to open Windows “Settings” menu.
- Click the “Apps” tab from the Settings app’s left pane, then select “Optional features” from the right side of the window.
- Now find and tap on the feature you no longer require and hit the “Uninstall” button

Read Also: What To Do When Windows 11 Doesn’t Support A Processor
To Wrap This Up
So, this is all about Windows 11 Optional features and how you can install and uninstall them. If you learned something new today or liked this post then share it with developer or programmer friends & nerds. Also, do tell us in the comments below if you know about this earlier or not. Try to explore these features at least once and do let us know

 Subscribe Now & Never Miss The Latest Tech Updates!