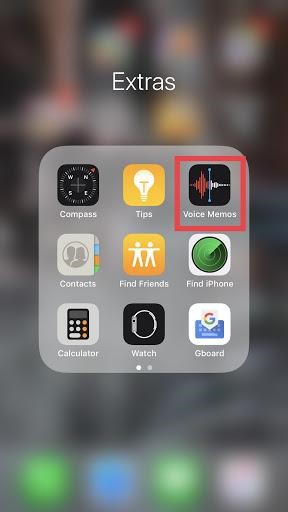
One of the appreciated apps of iOS 12 is an updated Voice memos application, which hit the market with plenty of features and functions to make your life easier and better. Having a voice memo app in your device is a gem and comes handy for taking notes and recording lectures. However, Apple’s Voice memo app offers way much more than just a recording snippet. Besides, editing and trimming your recording, it offers extremely sophisticated interface. So, let’s check out how to operate Apple’s Voice Memos app smoothly.
How to Use Voice Memos App for Recording?
Apple’s Voice Memos is a fast, effective and simple to use app that has a lot more to offer you. Read on to know how to use Voice memos app for recording.
Step 1: Access the Voice Memo app from your Home screen.

Step 2: You will notice a big red circle record button, you need to click on it.

Step 3: Click on the white button which is located at the above the record tab to show the pause.
Step 4: You need to click on the pause button in case you want to pause the recording but once you’re done resume it.
Step 5: Hit Done, once you are completed. You will notice you recording in the recording list which is listed at the record tab..
 Tips To Control iPhone Notifications With iOS 12Read this to know how to control notifications with iOS 12. From controlling notification from a lock screen, activating or...
How to Share Your Voice Memos Recording?
Just like you share your pictures with your friends, the app lets you share your voice memos recording. Follow the below mentioned steps to share your recording.
Step 1: Open Apple’s Voice Memos app.
Step 2: Select the existing recording in the app that you’re interested in sharing.
Step 3: Hit More button (three horizontal dots button) which is available at the bottom-left of the same recording.
Step 4: Click on Share.

Step 5: Choose the method, you want to use to share your recordings and that’s it.

 How To Check If Your iPhone Is Real...Read this to know how to detect whether your iPhone is real or fake. We have mentioned performance, physical and...
How to Listen to Your Previously Recorded Memos?
You can access all the existing recording in the Voice Memos App. Follow the below instruction to listen to your previously recorded memos.
Step 1: From your Home screen launch the Voice Memos app.
Step 2: Click on the Voice memo, you’re interested in listening.
Step 3: Hit Play Button.

 Best Music Making Apps For iPhoneRead this to know about the song making apps which can help you create, mix and add effects to your...
How to Tweak the Name Of The Recordings?
If you’re using Apple’s Voice memos and made any typo while naming your recording, then don’t worry you can tweak the name of the recording your original video any time you want. Follow the steps to tweak the name of the recordings.
Step 1: Open the Voice Memos.
Step 2: Click on the recording you want to tweak name.
Step 3: Hit on the name of the recording.
Note: The name of the recording will be displayed in blue.
Step 4: Type down the new name you want to use.
Step 5: Now, click anywhere on the screen to save the changes.
How to Edit Voice Memos?
Getting a perfect length of a recording is quite seldom but you can get perfection in your recording by editing them the way you like. Follow the below steps to edit your voice memos:
Step 1: Access your Voice Memos app from your Home screen.
Note: In case you’re not able to locate your Voice memos app, you can find it in the Utility folder.
Step 2: Click on the recording that you would like to edit and then choose more button located at the left of the recording.
Step 3: Hit Edit Recording.

Step 4: Now, you need to click on the Trim button to initiate the editing.

Step 5: You need to drag your trimer slider to both the ends to trim of the desired part of the recording.
Step 6: Click on the Trim to trim off unwanted part of the recordings. you can also remove the remaining recording by clicking on delete button.
Step 7: Choose Save and then Done.
 How To Enable LED Notification On iPhoneIf you’re looking forward for a quick tip put your iPhone flash light up for messages, calls, emails and social...
Now, you’ve learned how to operate Apple’s Voice Memos app to get most out of it. You can edit, trim and eliminate your recording in the Voice Memos. Please let us know what’s your opinion about this upgraded voice memo in the below comments section.


 Subscribe Now & Never Miss The Latest Tech Updates!