
So, for the past couple of weeks, I’ve been extremely bothered by the amount of memory my system is consuming even when sitting idle. I remember it all started after I upgraded my PC with Windows 10 Fall Creators Update. The performance has been awful & the system is struggling even with executing simple tasks.
After checking some Windows forums, I realized there are several users who are dealing with memory leaks issues or 100 disk usage Windows 10 error. Some were complaining about random freezing issues while some were annoyed with unexpected system crashes. So, if you’re one of those users who’s dealing with the same PC issues, then you’ve landed to the right place!
After trying multiple solutions, I’ve finally managed to fix high disk usage on Windows 10, so below is the write-up to discuss – What are the possible causes to 100 disk usage Windows 10 error & what you can do to fix them.

Image Source: thestories.net
Also Read: best free pc speed up software
What Is 100 Disk Usage Windows 10 Error?
Or you can say Memory Leaks, this error simply refers to a portion of RAM that a program marks as ‘in use’ but isn’t actually consuming it. That means, a specific program is using more memory than it should, even the allocated space cannot be used for any other purposes & it remains wasted. This happens when a particular program fails to inform Windows RAM manager that they’ve stopped using a RAM segment & it is free to use the allocated memory again.
Therefore, if you’re facing memory leaks or 100 disk usage Windows 10 error while using default applications, then clearly there’s a problem that needs to be solved immediately.
| Quick Tip: Try restarting your computer to fix memory leak issues, but this won’t help in the long run as the programs will probably leak memory again! |
How To Identify Memory Leaks In Windows 10?
Using Windows Task Manager, you can easily figure out all the running programs along with the memory allocated to them. To launch Task Manager: Press CTRL + SHIFT + Esc altogether > Go to Processes tab > All the active CPU and Memory usage details will be listed there > Look for the programs that are consuming the most RAM than usual. Applications that are eating over 50% memory are your culprits. Based on your preferences, you can choose to reinstall or reset to fix memory leak issues.
If the applications that are leaking memory are default Windows services then keep applying below solutions.

Image Source: MakeUseOf
Read about Best RAM Cleaners for Windows 10
Reasons Behind 100 Disk Usage Windows 10 Error
This happens when a particular program requests more memory than it actually requires. This can lead to unavailability of enough resources to other programs and process, which eventually leads to slow down issues. Possible cause of Memory Leaks includes:
- Faulty Drivers
- Malware Infection
- Registry Errors
- Startup Programs
- Running Unwanted Programs
These are some of the most common factors causing high disk usage on Windows 10. Let’s figure out how to solve these issues to avoid high disk usage on Windows 10.
How To Fix Memory Leak Issues On Windows 10?
Restarting your PC is probably not the most effective solution to fix 100 Disk Usage Windows 10 Error, follow these methods and check which works best for you:
Solution 1: Fixing Outdated, Missing or Damaged Drivers
For several users, outdated or faulty drivers are the main reason behind potential memory leak issues. To fix the errors manually, follow the steps below:
- Go to Settings & search for Device Manager
- A list of all the installed drivers will be presented
- Double-click to expand the device section
- Right-click to Update, Disable, Uninstall device drivers
- If you choose to update the driver, you’ll be asked to search for the compatible driver software Vist the device’s manufacturer’s official website & install latest drivers for all the devices

| Author’s Tip: Installing incompatible device drivers can lead your system to end up with major errors. Therefore, it’s highly recommended to use third-party driver updater tools for fixing faulty drivers. |
Solution 2: Checking & Removing Malware Infection
If your PC is plagued with malicious content, it almost certainly won’t perform well. So the only logical thing remains to do is to clean your computer. You can use Windows Defender for it, a built-in antivirus program that can help you to detect virus, spyware and other infections. To run a system scan with Windows Defender, follow the steps below:
- In Search menu > type Virus & threat protection
- Locate and click ‘Run a new advanced scan’ option
- A list of multiple scanning features will be presented
- Choose ‘Full Scan’ option to let Windows Defender scan your entire system for malicious content

| Author’s Tip: Windows Defender is not capable enough to detect the latest malware infections and other viruses. Relying on third-party Antimalware Tools is the best bet to keep your system protected from malicious threats. |
Solution 3: Registry Tweak To Fix Memory Leak Issues
Sometimes a simple registry hack can solve the high disk usage on Windows 10. Just follow the step-by-step method to fix the leak issue:
- Launch Run Window and type ‘regedit’
- Backup Registry Database & navigate to the following key
HKEY_LOCAL_MACHINE\SYSTEM\CurrentControlSet\Control\SessionManager\MemoryManagment
- On the right pane, double-click on ‘ClearPageFileAtShutDown’ & change its value to 1
- Close the Registry Editor & Restart system to apply the changes

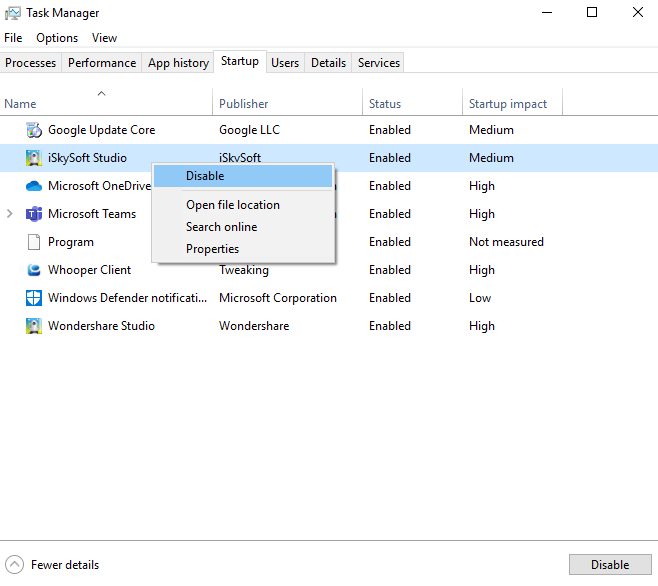
Solution 4: Manage Startup Items & Uninstall Unnecessary Background Apps
Too many startup applications can undoubtedly lead to unnecessary system resource usage & sluggish PC behavior. You can use the Task Manager to disable those unnecessary running items.
Also, do not forget to uninstall as many unwanted applications as you can. They consume a lot more space than they are required. Go to Control Panel > Under Programs option > Click on Uninstall a program to get rid of unwanted background apps.

Solution 5: Disable Superfetch
Users who are unaware of Superfetch is a Windows service that aims to optimize the performance of the system. It helps your system as a dedicated RAM Cleaner, to manage boot time and more. However, at the same time, it causes high disk usage in Windows 10. So you can try disabling it using Command Prompt. Here’s a full guide on How To Disable Superfetch in Windows 10.
Solution 6: Adjust Windows 10 For The Best Performance
Windows brings a setting option to help you fix memory, CPU & performance-related issues via adjusting the system for best performance. To use the setting:
- Head towards File Explorer > Right-Click on This PC
- Click on Properties > Select Advanced System Settings from the left panel
- On the Next System Properties pop-up, click on Settings
- Choose the option ‘Adjust for best performance’
- The process will work like an optimum RAM Cleaner for boosting system performance
- Apply the changes and click OK
- Restart your PC

Use Advanced System Optimizer To Fix Various Problems
If applying all the fixes one by one seems cumbersome to you, then try using a third-party tool that can help you perform all the tasks at one place. We recommend using Advanced System Optimizer by Systweak Software for the purpose, it has multiple modules to fix all the common PC issues. Ranging from Cleaning module to Registry Cleaner, Game Booster, RAM Cleaner, Driver Updater, Backup Manager, Startup Manager and more. Download Advanced System Optimizer for super-smooth & lag-free Windows performance.
More Than 100 Million People Have Downloaded It!

 Subscribe Now & Never Miss The Latest Tech Updates!