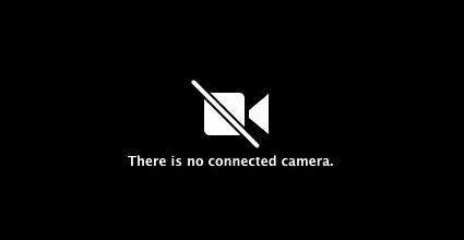
So, after tons of requests from several users, here is a complete guide about fixing the “There is no connected camera” error with Mac FaceTime or other camera apps. Earlier, the video chatting application was not equipped with potential features set, but now with every update, the app is getting stable and enriched with tons of functionalities.
Since FaceTime activates automatically, I am assuming you aren’t wondering how to connect a camera on Mac. But sometimes, the entire activation process fails and you might witness the annoying error message “There is no connected camera”.

How To Fix ‘There is No Connected Camera’ Error On Mac?
There are a couple of ways to fix the annoying camera issue. Do follow them one by one until your problem gets resolved.
METHOD 1 – Restart Your MacBook
For starters, you can fix the ‘Camera not connected’ problem by restarting your device properly. The workaround has certainly helped to resolve multiple kinds of errors and problems on the MacBook. So, there’s a good probability that it may fix your problem too. Try restarting your Mac every once in a while, to check whether the problem has gone away or not. If it didn’t help, check out the next workaround!
Must-Check:
METHOD 2- Run Series Of Terminal Commands
In this method, you need to run a series of command lines in the Terminal app to fix the ‘Camera no connected’ error on Mac while using the FaceTime application. To do so, follow the instructions below:
|
STEP 1- First of all, close all the applications that require the Camera to work properly. STEP 2- Once done, go to the Applications > Utilities > open Terminal application. STEP 3- From the Terminal, you need to execute the following command line and click on the Return button.
STEP 4- Next, you need to type the command line:
STEP 5- Hit the Return button to complete the process.
You might have to give the Admin password and relaunch the FaceTime & other camera apps to check whether it is working or not. Hopefully, the error message “There is no connected camera” should be resolved by now. |
Must-Read: Steps To Customise Your Mac Terminal & Increase Productivity
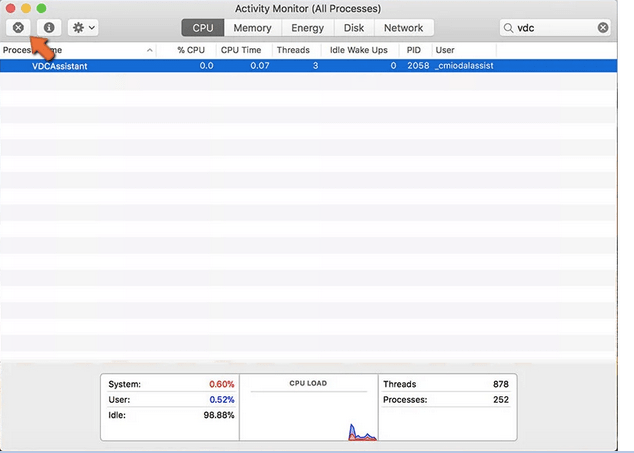
METHOD 3- Check Activity Monitor
Simply close/quit all the applications which need a camera to work. After that, all you have to do is:
| STEP 1- Go to the Applications and find Utilities.
STEP 2- Launch Activity Monitor and click on the Process Name to sort everything in alphabetical order. STEP 3- Once done, you need to find VDC Assistant and click on the same to open it. STEP 4- Now simply, hit the (X) button, located at the top-left corner of the screen, and close the program.
Alternatively, you need to check the Camera Privacy Settings and make necessary alterations if needed, to fix the “There is no connected camera” error on Mac.
|
METHOD 4- Reset SMC
Well, if the problem ‘There is no connected camera’ persists, then you can try fixing the issue by resetting the SMC (System Management Controller) on your MacBook. To do so, first, you need to determine whether the battery is removable or not & then follow the steps accordingly:
|
For Non-Removable Battery Macs: STEP 1- Click on the Apple menu and Shut down your system. Keep patience and wait for your Mac to shut down properly. STEP 2- Press – SHIFT + CONTROL + OPTION and press the Power button simultaneously. STEP 3- Make sure you hold the keys for at least 10 seconds. STEP 4- Release the keys after some time and press the Power button again to turn on your Mac. For Removable Battery Macs: STEP 1- Shut down your Mac and remove your Mac’s battery. Alternatively, you can contact an Apple Authorized Service Provider for help. STEP 2- Now press and hold the Power button for at least five seconds. STEP 3- Insert the battery carefully and hit the Power button again to switch on your Mac.
This is how you have successfully reset the SMC on Mac. Check whether the error message ‘There is no connected camera’ is still occurring or not. You Might Want To Learn: |
At last, it’s worth mentioning that you can also trigger the problem “Camera not connected” accidentally if you have disabled the built-in hardware camera by unintentionally moving a specific system component file that is required by the Camera to work properly. Doing so, certainly breaks the Camera’s functioning, making it ‘not found’ or ‘unable to use’ for other Camera applications. So, keep a check on your Camera settings and make necessary changes.
Frequently Asked Questions –
Q.1. How do you fix a Mac that has no connected camera error?
First of all reboot your Mac and then closely check for any errors or running applications that might be interfering with your camera. If none of those work, check the Activity Monitor, run Terminal commands, and reset System Management Controller. Check the aforementioned methods to fix the issues.
Q.2. Why does my Mac Say No camera found?
If your camera is busy with another application, it can often show this error. Say, if you are still in a VoIP call and then trying to turn on your Mac camera for another application, it will not work. Other system errors might be behind the Camera not connected error.
Wrapping up –
If you know any other method to fix ‘There is no connected camera’ on Mac while using FaceTime or any other camera application, do mention them in the comments section below!
We hope this article will help you learn about the “Camera not connected” error on Mac. We would like to know your views on this post to make it more useful. Your suggestions and comments are welcome in the comment section below. Share the information with your friends and others by sharing the article on social media.
We love to hear from you!
For any queries or suggestions, please let us know in the comments section below. We would love to get back to you with a solution. We regularly post tips and tricks, along with answers to common issues related to technology.
If you know any other method to fix ‘There is no connected camera’ on Mac while using FaceTime or any other camera application, do mention them in the comments section below!


 Subscribe Now & Never Miss The Latest Tech Updates!