So, what’s your key to boost productivity while using Mac? Well, if you ask us, it differs from user to user & what time-saving tricks and hacks they use to automate the process. If you are wondering how to execute multiple tasks at a much faster rate, the answer comes down to the ability to quickly switch from one application to another webpage & others.
Fortunately, macOS allows users to open two windows side-by-side via split-screen mode. It offers an excellent way to focus on current work and cut out unnecessary background clutter.
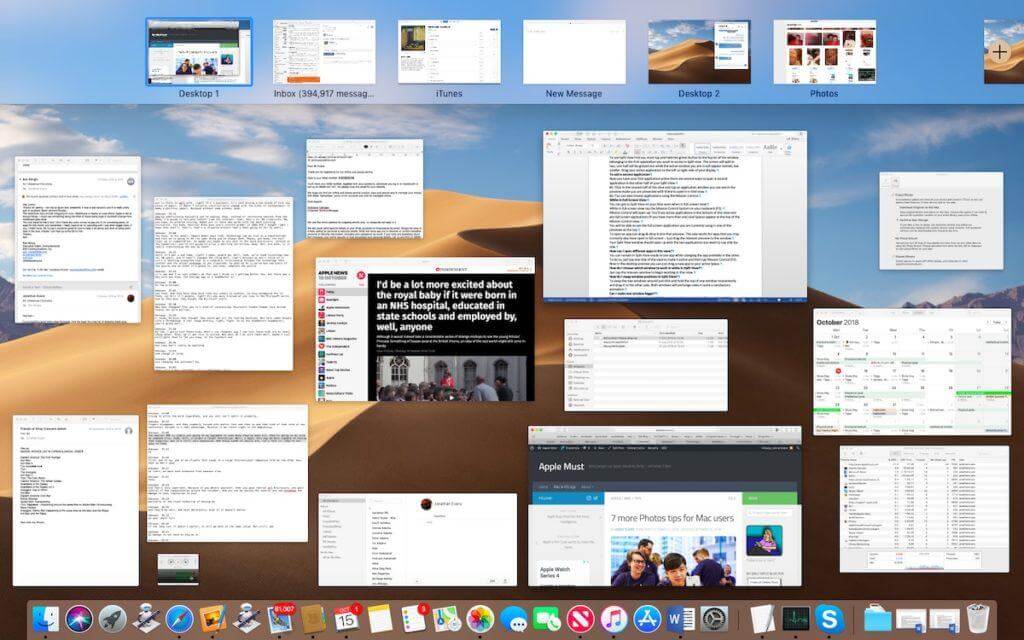
In this post, we’ll learn all about using the Split Screen feature on MacBook Air/Pro!
How To Use Split Screen On macOS Catalina & Above Versions?
Follow the instructions shared below to get started:
STEP 1 – Open your favorite Mac app.
STEP 2 – Now leave the window of the app open and open another application that you want to use parallelly. For reference purposes, I am using Apple Shortcuts and Apple Maps together.
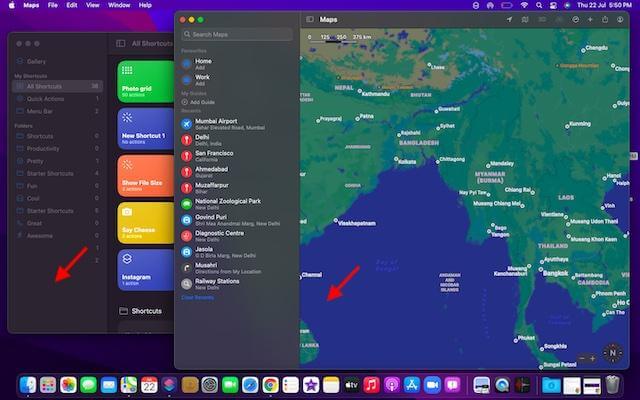
STEP 3 – You can manage red, yellow, and green buttons at the top-left corner of the Window. To get access to ‘more options related to split view mode’ on Mac, simply click and hover the mouse cursor over the green button as shown in the screenshot shared below.
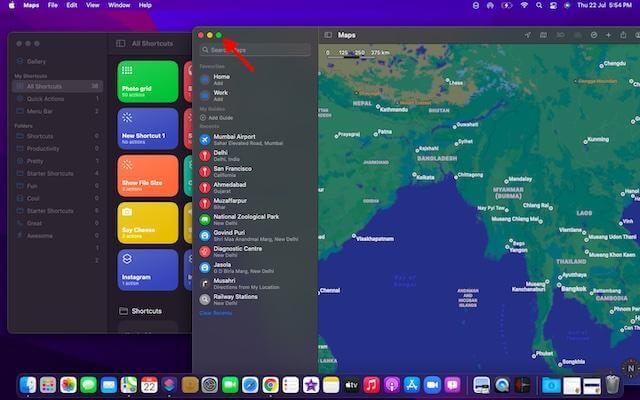
Remember: In case the green button located at the top-right corner of the screen is greyed out, it means the specific application doesn’t support Split Screen functionality on Mac.
STEP 4 – You can utilize the Tile Window to Left Screen or Tile Window to Right Screen option to move the window in any of the directions.
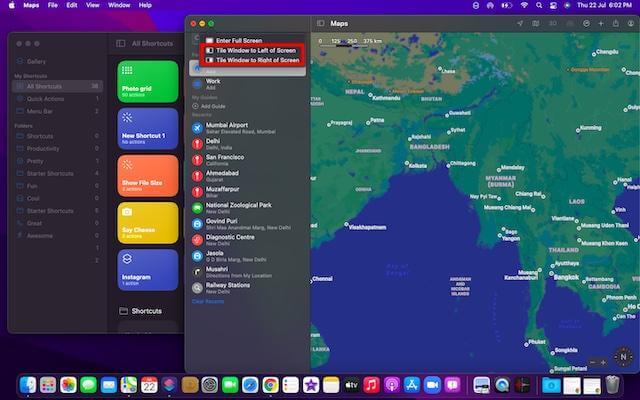
STEP 5 – At this point, you need to choose the other app you wish to use alongside the application you just moved to the right or left. To make the task easier, the OS will start showing other app windows.
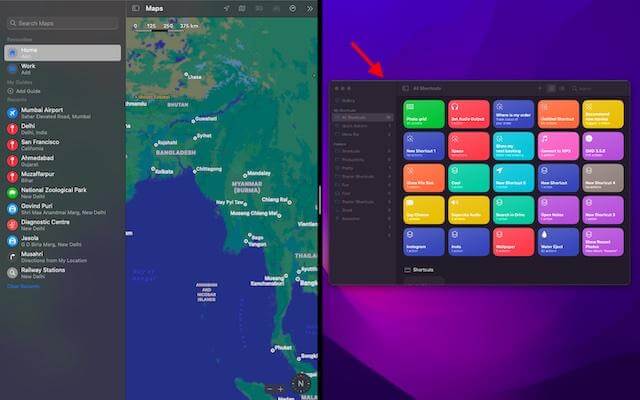
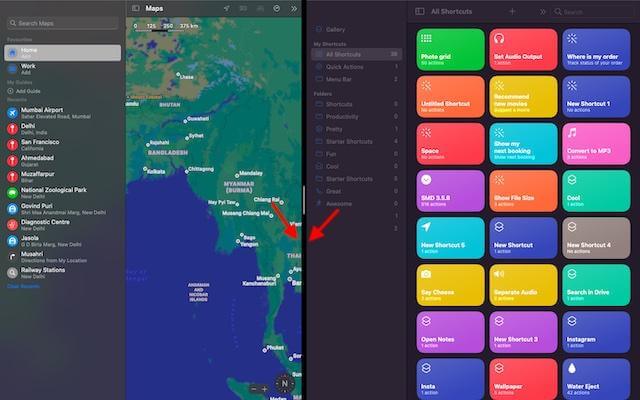
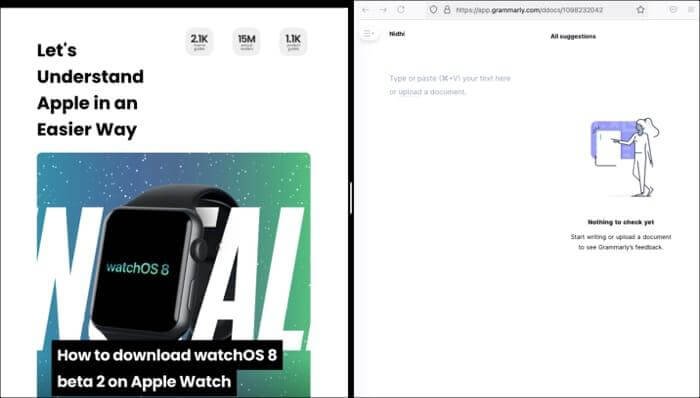
STEP 6 – As soon as you’ve selected the second macOS app, it indicates that you have successfully activated the split-screen on Mac. Now, simply hold and drag the black divider line to any of the directions to adjust the portion of using both Mac apps simultaneously.
Get Started Using Split View On Mac (Running macOS Older Versions)
Follow the instructions mentioned below to start using the Split View feature on macOS Mojave and earlier versions.
STEP 1 – To initiate the Split Screen feature, launch two apps you want to use simultaneously on your Mac machine.
STEP 2 – At this step, you need to click and hold the ‘green’ full-screen button. As soon as you activate this option, the window will shrink and you can manage to move it to the left or the right side.
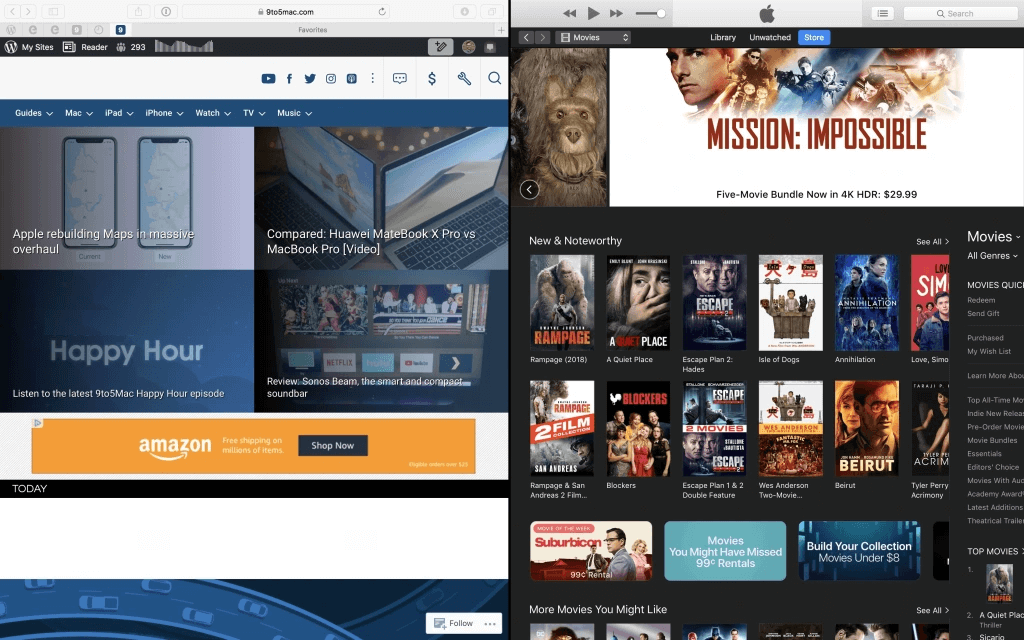
STEP 3 – That’s it! Now you can release the button and click on the app window on the other side of the screen to use both the window parallelly.
This is how you can easily activate Split Screen on a Mac to boost overall productivity!
Alternative Way To Use Split Screen On Mac Via Mission Control
Here’s what you need to do to enter into Split Screen on Mac through Mission Control.
STEP 1 – To get started, simply launch any Mac Application window in full-screen view.
STEP 2 – At this point, you need to open Mission Control. You can do so by any of the methods shared below:
- Simply press Control and the Up-arrow key simultaneously.
- You can swipe up using your four fingers on the trackpad to launch Mission Control.
- Using Magic mouse, just double-tap with two fingers and you should see two thumbnails at the top of the screen.
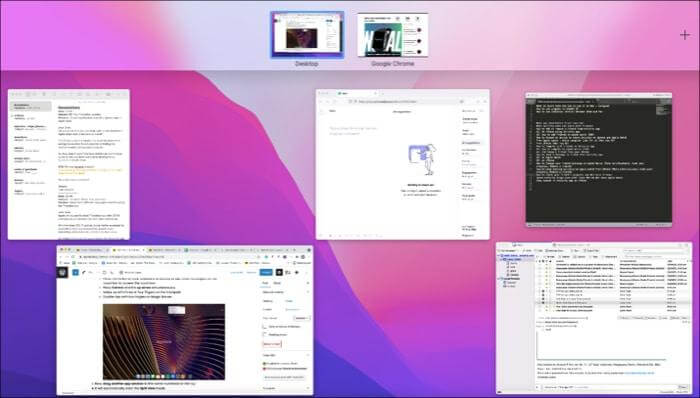
STEP 3 – At this step, you are required to drag another application window to the full-screen view thumbnail. You can refer to the screenshots shared below to get a clearer idea. This action will instantly open the split-screen on Mac.
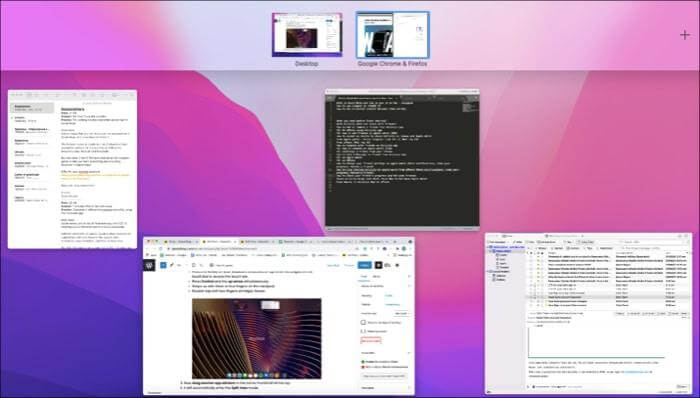
This will automatically help you enter the Split View mode on your Mac.
Must-Read: The Best Mac Apps & Utilities You Should Have In 2022
 Additional Tip
Tips To Adjust Split Screen On A Mac:
Here are some tips and tricks that can help you manage split-screen view:
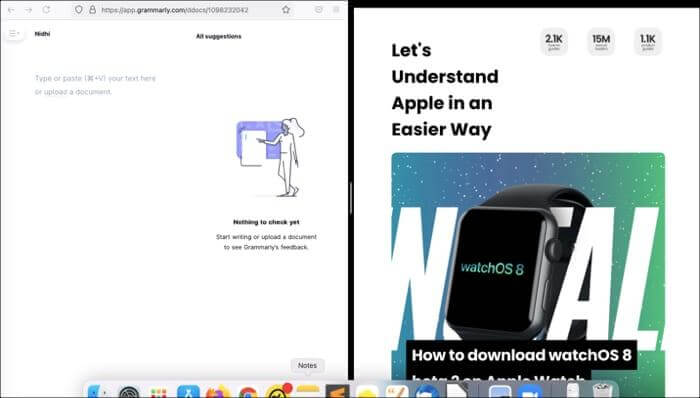
- To resize – Just hit the borders between two windows. To change it to the original size, simply double-click on the border.

- Use the menu bar in Split Screen: Just navigate the cursor to the top of the window and start using the Menu bar in Split screen on Mac.
- Use the dock in Split Screen: Simply navigate the cursor to the bottom of the window and start using Dock in the split-screen view.
How Do I Exit The Split Screen Mode On Mac?
Well, closing the Split Screen feature is a simple process. All you need to do is:
STEP 1 – Simply move the mouse cursor to the top of the screen to reveal the window options.
STEP 2 – Here, you need to click on the full-screen button on either of the windows.
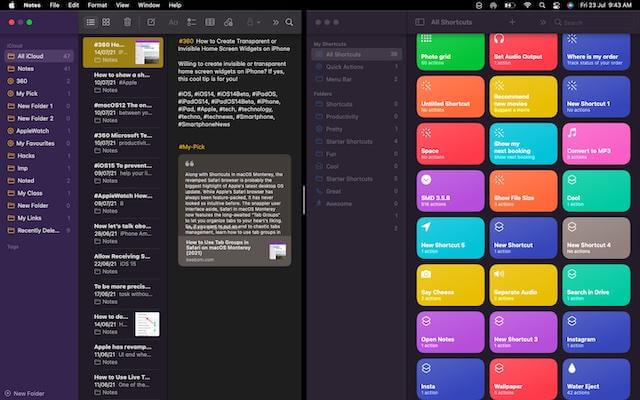
STEP 3 – As soon as you do that, the specific window will exit the Split view and the other window will automatically switch to the full-screen view.
Hopefully, this guide helped you to enter, use and exit the Split screen on Mac without any hassles.
Try The Best Split Screen Alternatives On Mac (2022)
The in-built Split Screen option helps users to manage two Mac Apps simultaneously. But what if you want to work with four, six, or eight windows to enhance productivity. Well, for that you need to use the best alternatives to Split Screen:
- Mosaic – It’s a great application to use Split Screen View without putting in much effort. The tool supports a variety of layout management and helps users to divide their Mac screen into columns, custom grids, rows, squares, etc.
- Magnet – This is one of the best alternatives to the Split Screen feature on your Mac. It helps in arranging all the apps on your screen. You can add multiple Mac applications and windows to enhance your workspace and improve productivity.
- Moom – This is another great option when it comes to managing multiple Mac apps on a single screen. It provides a variety of features to resize, drag, move, zoom multiple windows without any hassles.
Are You Not Able To Try Split Screen On Mac? Well, Make Sure This Option Is Toggled On!
Are you struggling in accessing Split Screen mode on your Mac? Well, you can execute the following steps to enter into Split View mode easily:
STEP 1 – Click on the Apple logo.
STEP 2 – Choose System Preferences from the drop-down menu.
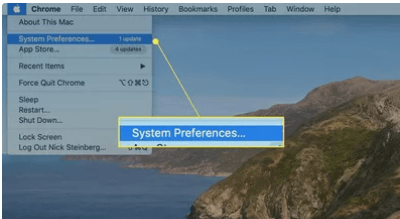
STEP 3 – Now, navigate to the Mission Control option.
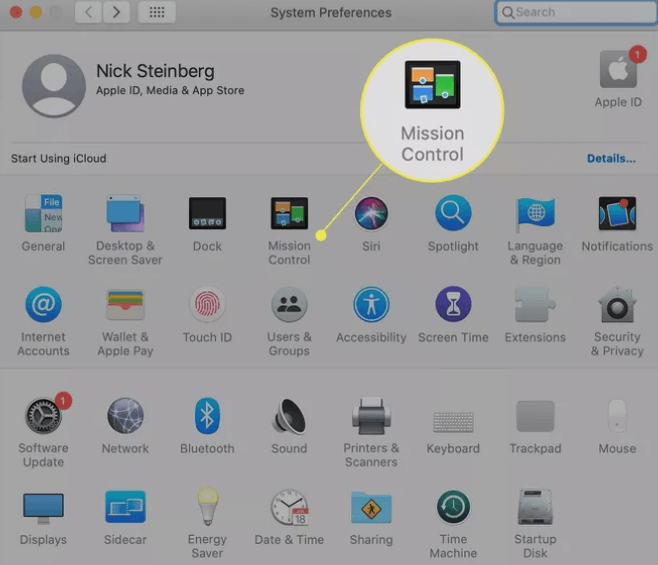
STEP 4 – Make sure the option Display has separate Space is selected.
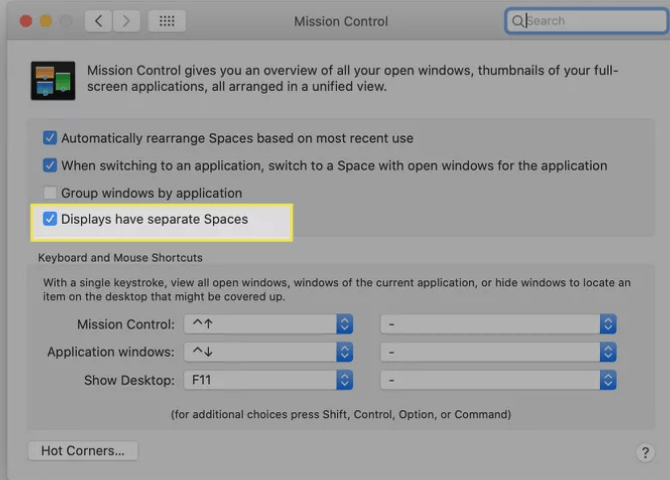
Hopefully, you will be able to access Split Screen on Mac without any hiccups!
The Final Word On How To Split Screen On A Mac In A Few Clicks (2022)
This blog would have now helped you to split screen on your Mac win more than one ways. Follow us on social media – Facebook, Instagram and YouTube.


 Subscribe Now & Never Miss The Latest Tech Updates!