To sort your emails, Gmail, the popular email client provides us with Categories. The Categories option includes Primary, Social, Promotions, Updates, and Forums. Most of the users love to sort their emails using them. However, if you are one of those who don’t use them or are not a fan, you can remove categories in Gmail with simple steps.
Thinking about how to do it? Don’t worry, in this blog, we will walk you through the steps to disable categories in Gmail on various devices, including computer, iOS, and Android.
Best Ways To Remove Categories In Gmail
Let’s get started!
How To Remove Categories In Gmail On Computer?
Note: These steps work on both Windows and Mac. Also, any changes made to Gmail Settings will reflect in all your devices.
To remove inbox categories in Gmail, follow these steps:
1. Open Gmail on your computer.
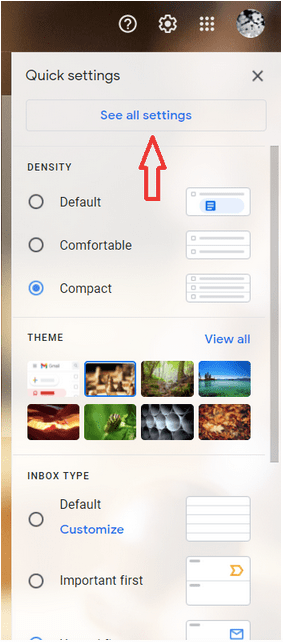
2. Locate Settings icon at upper right corner.
![]()
3. Now click See all settings.
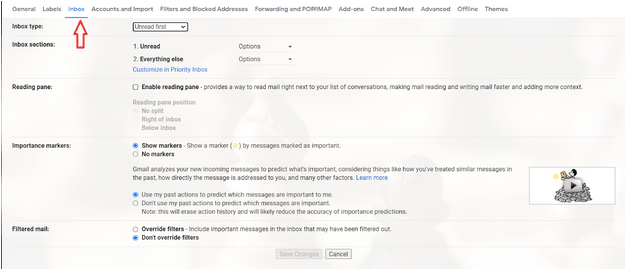
4. Go to the Inbox tab and select Default.
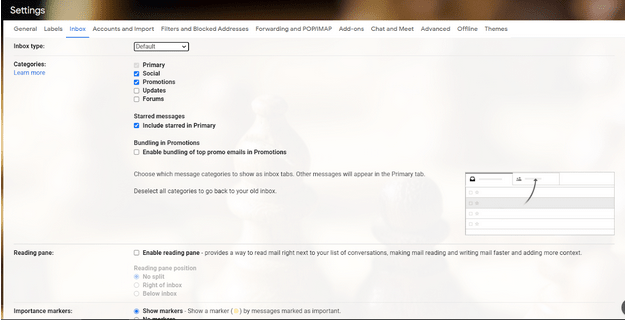
5. You will get the Categories section just below it. It will show all the available categories and a checkmark beside them shows which of them is used. Remove checkmarks to disable the categories.
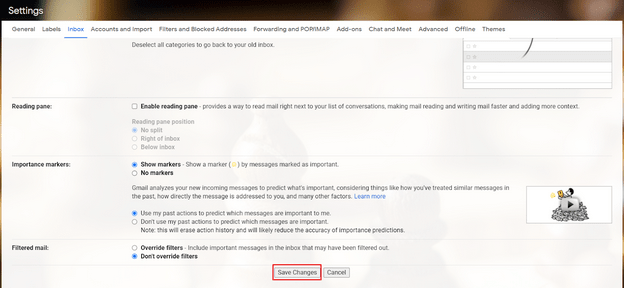
6. To save, scroll to the bottom and click Save Changes.
Once it is done, make sure you log out and log in for the changes to show. Also, if you have a lot of emails, it would take time for emails to appear in the Inbox, so be patient.
How To Remove Categories In Gmail On iOS?
To remove categories in Gmail on iPhone/iPad, follow these steps:
1. Go to the Gmail app on your iPhone/iPad.
2. Locate Menu at the left corner. Tap on Settings.
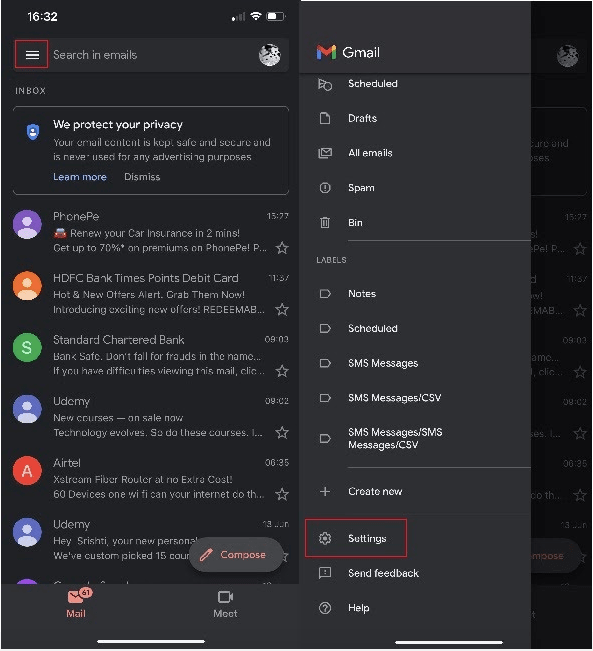
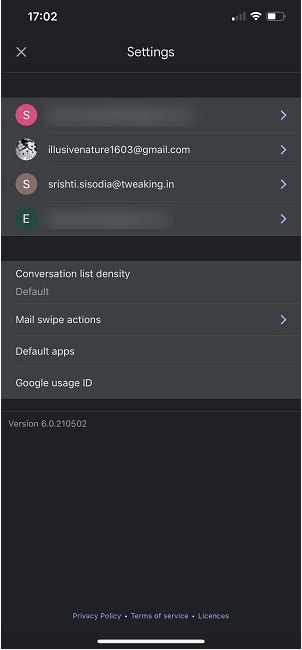
3. Choose your Gmail account in which you want to make changes.
4. Select Inbox type, and tap on Default Inbox.
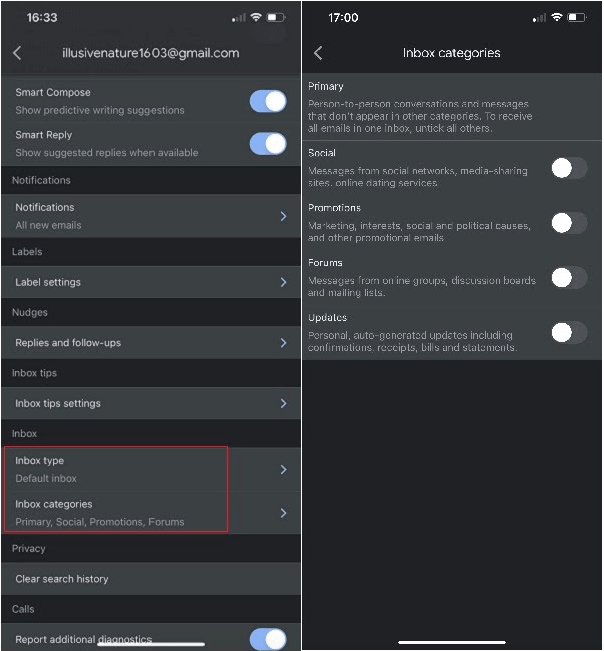
5. Tap on the Back arrow and tap on Inbox Categories.
6. Tap on the toggle buttons to disable categories.
Once done, you will see the changes instantly.
How To Remove Categories In Gmail On Android?
Follow these steps to disable categories in Gmail on your Android device:
1. Open Gmail app.
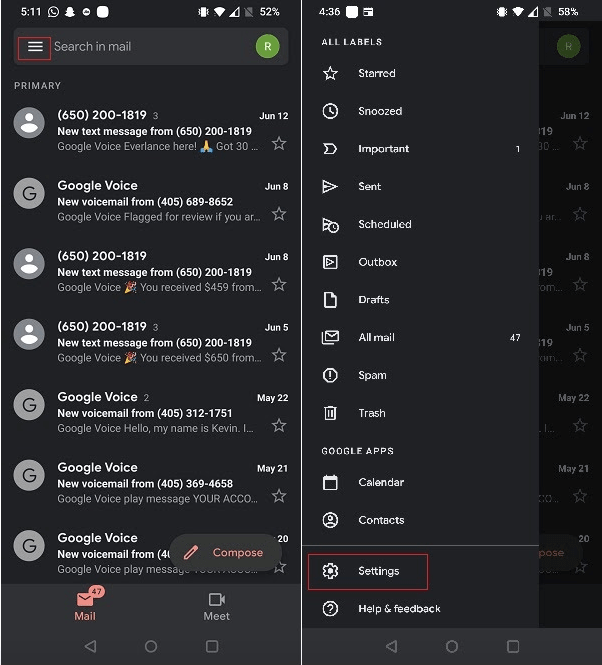
2. Locate Menu (the hamburger icon) from the upper left corner and tap on it.
3. Select Settings. Choose your Gmail account.
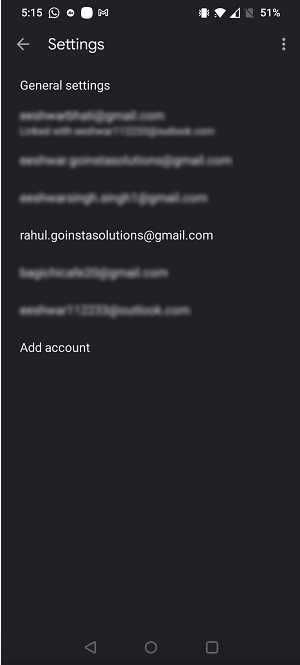
4. Tap on Inbox type->Default Inbox
5. Go to Inbox Categories.
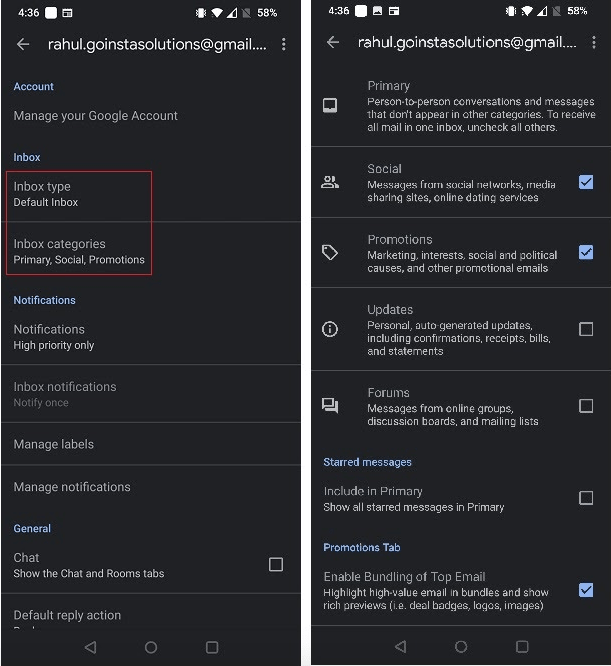
6. Tap on the checkmarks to remove categories.
Once done, you will see the changes instantly.
In this way, you can add/remove categories to your Gmail account. If you have multiple accounts, please follow these steps for each one of your accounts to sort your emails as per your requirements.
Liked our blog? Please let us know in the comments section below. For updates and more such tech-related articles, watch this space.
Frequently Asked Questions:
How To Move An Email To A New Category?
To add an email in a certain category, drag that email to the category tab. To ensure all your future emails from that sender land in that category, click on the bottom left notification, select Yes.
Can Gmail Be Restored To Default Settings?
There is no easy way of saying this, but sadly if you have messed up your Gmail settings, you can’t restore it to default. To return to its original, you must go to each tab and disable all the settings that you don’t want.


 Subscribe Now & Never Miss The Latest Tech Updates!
Craig Lewis
This article is fine as far as it goes, but it fails to recognize one fact. When you delete a message from your inbox, but NOT the categories to which it’s been assigned, that email still exists in those categories. Even after you empty trash, it still exists. This means it’s still taking up memory on your phone or tablet or computer. You might think, oh, you’ve been regularly deleting promo emails, your inbox is pretty clean, so why does gmail say you’ve still got gigabtyes worth of mail? THIS IS WHY. You may have *thousands* in those damned categories.Preeti Seth
Hello Craig, Thank you for sharing your input. Please note that deleting an email from Inox automatically removed the email from the category. However, if you don’t clean the Trash where the deleted email stays for 30 days, you will be able to see it. Also, most users get confused with labels and categories. Please note both aren’t the same, and removing a label doesn’t mean it will delete the email. It only means you won’t be able to see the label, but the email will exist. To remove such emails, select them > hit the delete icon > and empty the Trash. This should help.Michael Levy
Unchecking the categories does not prevent emails from being categorized. It just doesn’t show you the category tabs. I have them all unchecked and emails still get assigned to those categories. We should be able to delete them outright and never have emails flagged with the categories.