Printing to PDF in macOS is a simple and straightforward process. You certainly don’t need dedicated software like Adobe Acrobat or Reader to get the task done. Follow this easy-to-understand how-to guide and learn how to use the built-in features to print and convert your files to PDF on Mac.
| For other PDF-specific content, you can run down to our series of articles: How To Edit PDFs on Mac (Offline & Online Ways) | How To Combine PDF Files? | How To Sign PDF On Mac? | Best Paid & Free PDF Editors | How To Convert PDF To JPG? |
How Do I Print A PDF File On Mac?
Well, in several cases you can avoid printing PDF files if you have access to smart software that can easily handle PDFs on Mac. But if you are looking for a manual process, follow the instructions below:
| STEP 1- Open the document, webpage, or file you would like to print to a PDF on Mac.
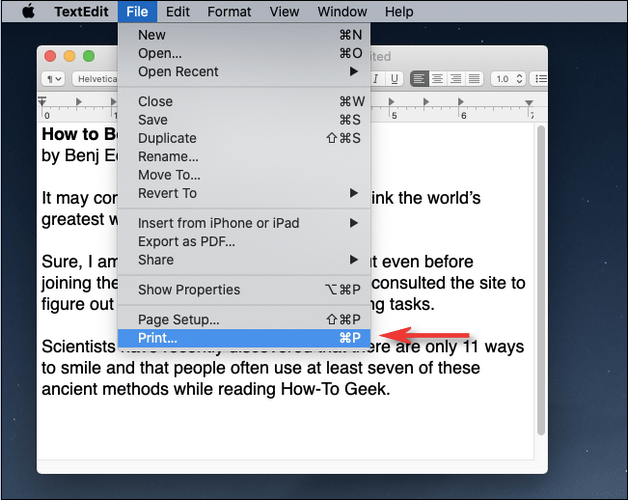
STEP 2- Navigate to the File menu and click the option Print. Alternatively, you can click the shortcut Command + P to complete the process.
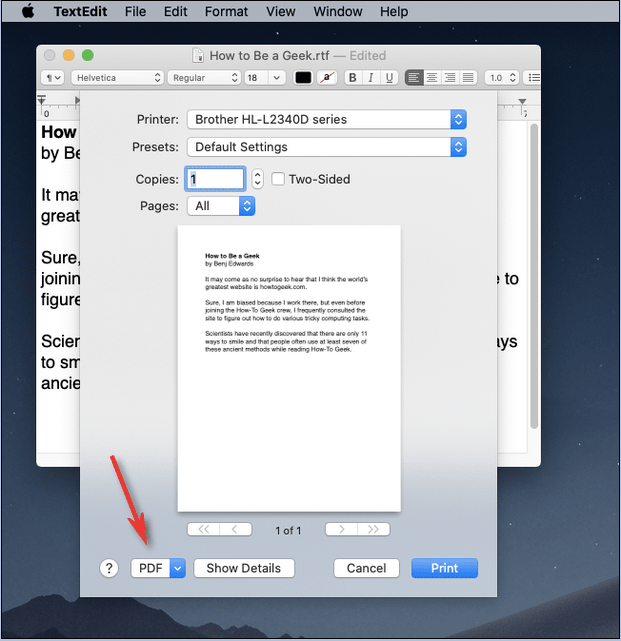
STEP 3- Locate and click the PDF button present in the bottom left corner of the screen.
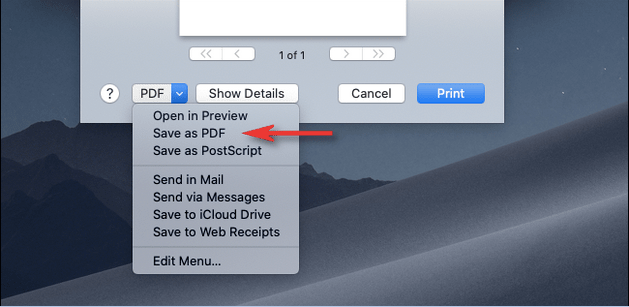
STEP 4- You need to pull-down the menu and choose option Save as PDF.
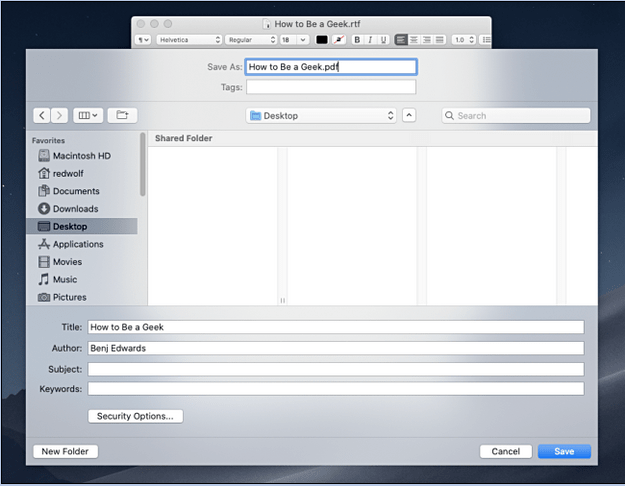
STEP 5- From the Save dialog box that appears on your screen, give the PDF file a Name and hit the Save button. Choose the desired file location where you want to store your PDF file.
That’s all! You’re now all set with your PDF. The process wasn’t difficult, right? These portable file documents are highly convenient and easily readable on several platforms. Now that you know how to make PDF’s, you can more effortlessly send files than ever before. |
Of course, there are several PDF Editors for Mac that can help you open, edit, review, and print your files. Market giants like Adobe Acrobat & Reader work very well, but their pricing models can make you think twice before investing in the utility.
Alternatively, there are many PDF Printers for Mac (Paid & Free options) that can help you achieve the task without following any additional steps.
Meet Top 4 PDF Printers For Mac
Here are a few pieces of software that can be used to convert documents to PDF and print them on Mac.
1. PDFelement | Try Now
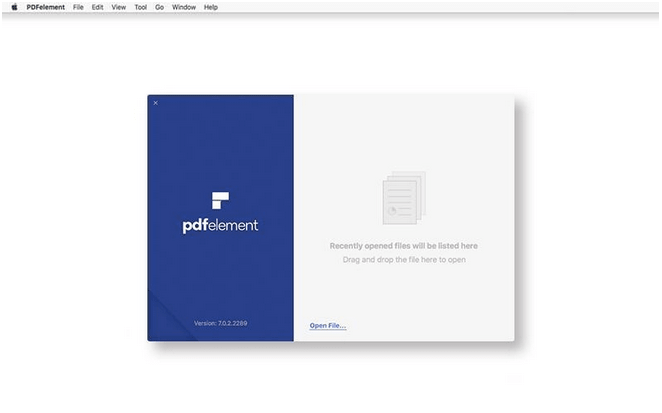
PDFelement by iSkysoft Software is one of the most highly recommended PDF printers available in the market. It assists users in printing multiple kinds of file formats to PDF. Additionally, it works like a virtual PDF printer, allowing you to print PDF in desired parameters.
How To Print To PDF On Mac Using PDFelement?
It’s an effortless way to create, convert, edit, share & print PDF files using this tool.
STEP 1- Install PDFelement on your Mac.
STEP 2- Go to the Toolbar and click on the File menu.
STEP 3- Find and click the Print option.
STEP 4- Change the orientation and page size accordingly
STEP 5- Name the PDF file and select the location to Save it carefully!
 Must-Read: How To Convert Different File Formats To PDF?
2. PDFwriter for Mac | Try Now
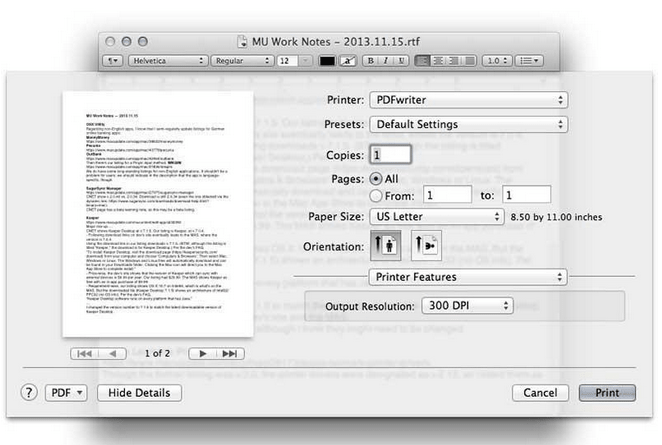
Unlike PDFelement, this program installs a printer drive on your Mac, which allows users to effortlessly create any PDF using the Print option in any file format possible. The PDF Printer application uses Mac’s internal capabilities to create synergy among different PDF tasks.
How To Print To PDF On Mac Using PDFwriter for Mac?
It offers a simple way to create PDFs just by printing. To use the tool, all you have to do is:
STEP 1- After installing PDFwriter, you need to add it to the list of your available printers.
STEP 2- Open System Preferences followed by Printers & Scanners option.
STEP 3- Click on the (+) button to make the PDFwriter available in the list of available printers.
STEP 4- Select 2 Pages Per Sheet or whatever other custom options of your choice.
3. iPubsoft PDF Creator | Try Now
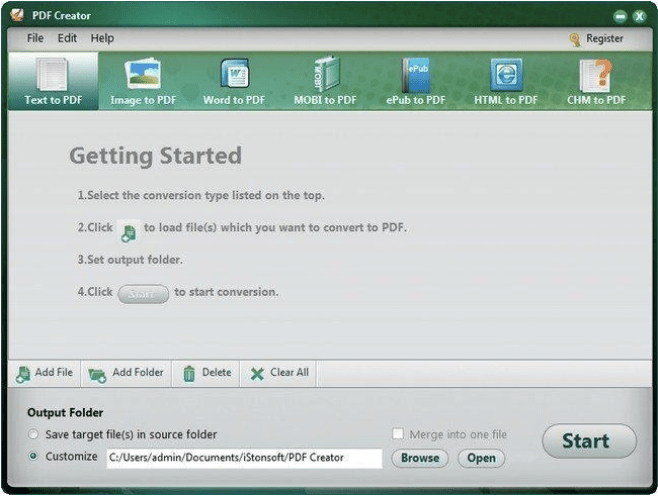
It is an excellent macOS PDF Printer, which allows users to print PDF files on the go. The program makes it an effortless process to create PDF files from text and image files, including JPG, PNG, GIF, BMP, TIFF, Docx, and more.
How To Print To PDF On Mac Using iPubsoft PDF Creator?
The tool is scanned and checked for potential viruses. Hence, you can install it securely:
STEP 1- After the installation process, click on the tab PDF and click on Save as PDF.
STEP 2- Here you need to select the folder where you would like to save converted PDFs.
STEP 3- Type and allot a name to the new PDF file.
STEP 4- Click the Save button to complete the conversion and saving process.
4. CutePDF Writer | Try Now
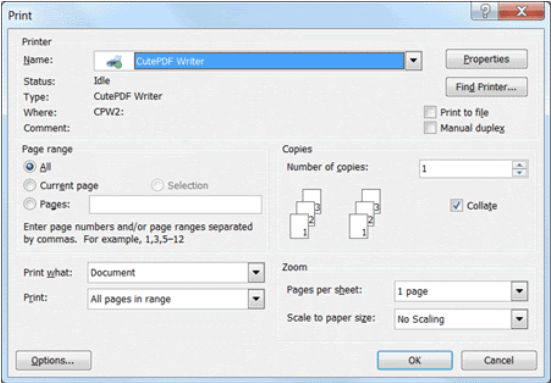
Meet another free PDF printer for Mac by Acro Software, CutePDF Writer. The program works perfectly when it comes to working as a virtual printer that allows any printable Windows app to convert into a PDF file without any hassle.
How To Print To PDF On Mac Using CutePDF Writer?
Well, the PDF printer for Mac is easy to use, unlike its professional version.
STEP 1- Simply open the file you would like to convert.
STEP 2- Click on the File tab and select the Print option from the drop-down menu.
STEP 3- As soon as the dialog box appears, you need to select CutePDF Writer from the Printer Names list.
STEP 4- You can set the orientations and other requirements according to your choice and click the OK button to save it!
From here, you can copy the PDF anywhere you like, back it up, or maybe save it for later reference. It’s all up to you! You can even view, review, edit, print, or share PDFs using Editing Programs like PDFelement, iSkysoft PDF Editor, PDF Buddy, Skim & more.


 Subscribe Now & Never Miss The Latest Tech Updates!