
Imagine you have a bunch of pictures taken on a trip and all of them are piled up in a folder with different nametags. Or in case you’ve been writing a script in different drafts, it’s important you name them accordingly to easily locate them by name. But, to rename multiple files is another level of headache and is definitely time-consuming. Luckily, Windows offers a very simple way to bulk rename all your files in a few clicks and steps. So, let’s see how you can manage your files by renaming them all at once.
There are various files that you wish had similar name tags to easily locate them and organize them in a single folder. These may be some .png files or some .doc files. You can rename the files with similar data inside them all together and help yourself organize your Windows PC better. Let’s get on to the process and learn how to rename multiple files at once on Windows.
Best Ways To Rename Multiple Files at Once in Windows
1. The Simple Way: Via File Explorer
Step 1: Find your Folder for Batch Renaming Files
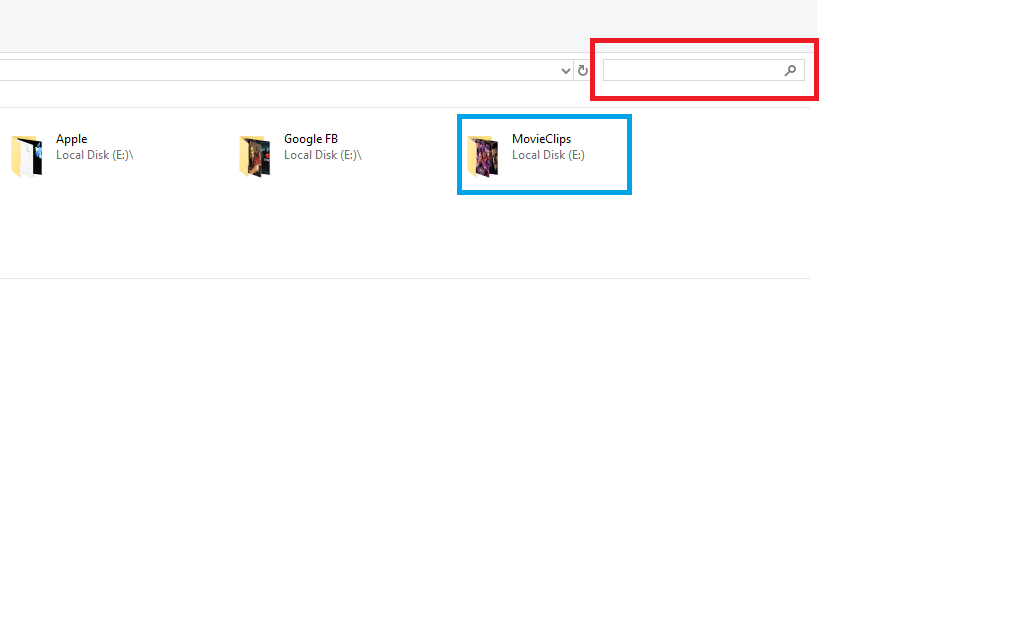
First, open up your file explorer and browse the folder from where you wish to select files for bulk renaming. You can either search for your desired folder on the search bar on the top right
corner; else, in case your folder is visible in Quick Access, you can directly select it from there.
Step 2: Select Files for Renaming
Now, hold the Control Key (Ctrl) and left-click on all the files you wish to batch rename. In case you wish to bulk rename all the files in the folder, simply press Ctrl+A to select all of them at once.

Here is a bunch of files downloaded as potential wallpapers for desktop screen. Now all of them are similar in genre but are all named differently. In case you wish to rename all the files in the folder, you need to select them all using Ctrl+A command. In case you have only a few files from the pile for batch renaming, go for the Ctrl+LeftClick option.
Now, after you have done that click on the Rename button on the expanded ribbon.
Step 3: Rename the First File per Your Choice
After you’ve selected all the files for bulk rename, and clicked on the Rename button, you’d see that you’re asked to rename the first file on the list. Only the first file.

Step 4: Rename the File per your choice
Now, choose a specific key name that would represent all the files in your selected folder. In this case, since all of them are wallpapers from a similar source, we can rename them all as “Avengers_Wallpapers”.

Now, as you can see, all the files are now renamed, and to provide every file with a distinction, it has been numbered from 1 to 11. And in a simple manner, you can batch rename files and can now organize them all together in a separate folder.
 5 Best Photo Resizer Apps For Windows PC...Optimizing images for web is a mandatory action if you wish to offer your visitors the best possible user experience....
2. Using Windows Powershell
To batch rename files in Windows, Powershell is another effective tool that you can use. But here, we are going to go a bit deep into the tech stuff. Since this process requires syntax and commands, it might sound really hard for someone who’s not into computers, but it’s just one simple command, which you can literally copy from here. So, let’s get down to the process.
Step 1: Open the folder that holds your files for batch renaming
You can do that the same way you did for batch renaming files using File Explorer. Just like in the previous process. Once you’ve found your desired folder, enter it by double clicking on it.
Step 2: Open Windows PowerShell
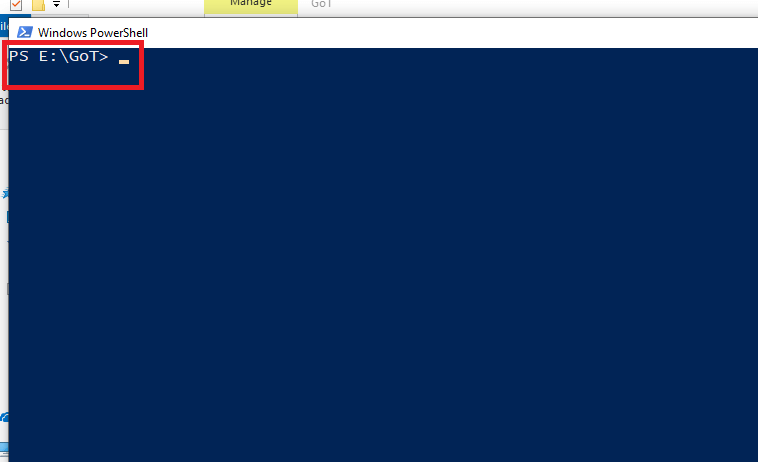
Once you are in the folder, press and hold the SHIFT key on your keyboard, and simultaneously press Right Click button on your mouse. You’ll see a new option in the menu, saying Open PowerShell Window Here.

Once you select this option in the red block, a PowerShell Window would pop up with your selected folder as its path directory.
Step 3: Enter the syntax
For the uninitiated, you don’t have to worry about the syntax, we have it right here for you.

Now copy this syntax on the PowerShell window and proceed to the next step. Remember, this syntax works only if you wish to proceed with batch renaming of files on Windows.

Step 4: Make changes in syntax to change the file name
Here, we need to enter what name we wish to give all our desired files in the folder. In the brackets, you need to enter the name you wish to give to the files, in the place of “new_filename” commandlet. To offer a format to your files, you need to delete “.ext” commandlet, and enter the desired format suffix.
For example, in the folder here, all the files are wallpaper images, so, we would change the name of all the files to GoTS8_Wallpapers and would keep all the files in .jpg format. In case the files are in text format or any other format for that matter, you can change the format accordingly. The syntax after the changes would look something like this;

So, once the changes are made, the command on PowerShell would be

Step 5: Press enter and your files would have been renamed

And once again, all files have been given unique serial numbers to provide distinction and avoid same name files.
Now, you’ve successfully batch renamed your files using Windows PowerShell.
 10 Best Image Converter Software for Windows 2022While using Windows, once in awhile you might have encountered the “Image Format not supported” alert. Now fix this on...
3. Using Third-Party Renaming Software
There are a number of open-source renaming software available on the web that allows you to batch rename your files on Windows. It’s a matter of another subject to determine which one’s best, but one of the easiest and comprehending one is File Renamer Basic. Let’s rename files using File Renamer to know it’s worth.
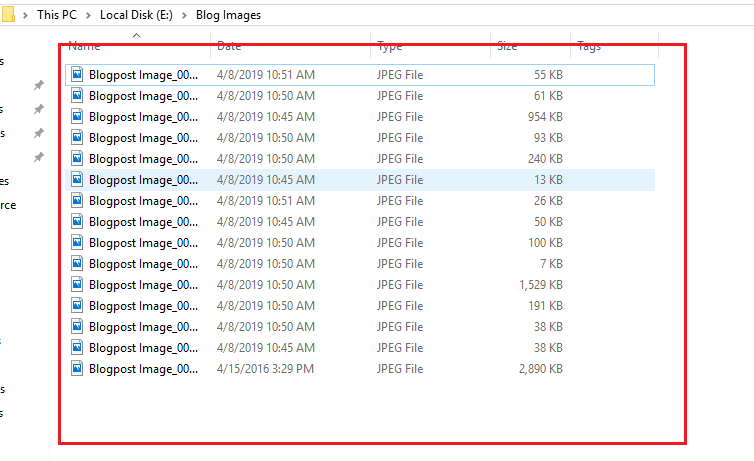
Step 1: Select Folder with Files to be Renamed
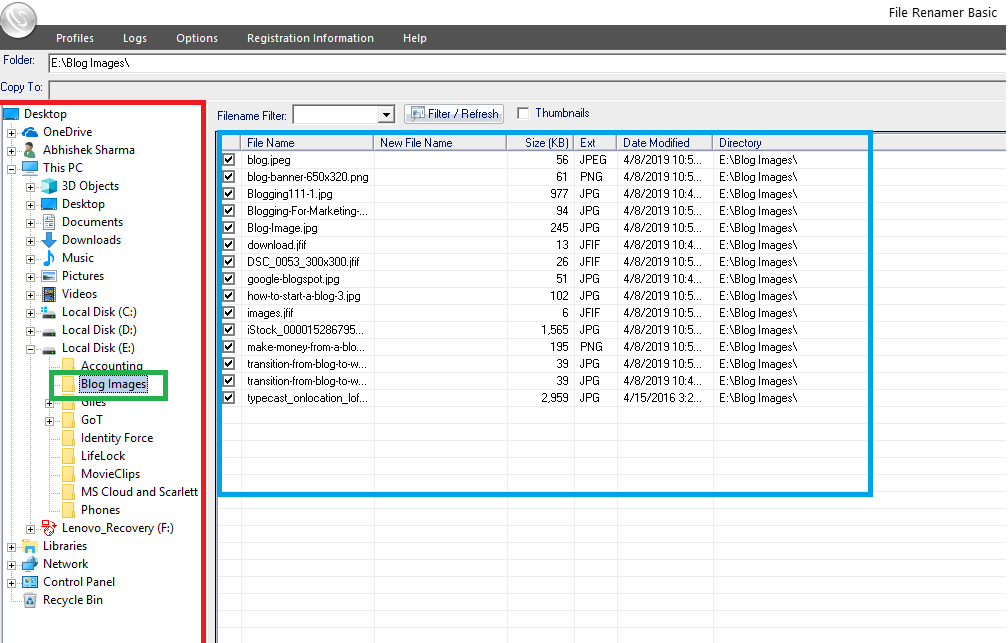
This would be the prompt window of File Renamer Basic. You can select the desired folder from the options in the left corner (marked in red). The folder chosen here is Blog Images (marked in green) from Local Disk: E. As soon as you click on the desired folder, you’d have all the containing files in that folder in the list to the right (marked in blue).
Step 2: Decide Preferences for New Name for the Files: Starting with Prefix
The lower part of the File Renamer Basic looks like this,

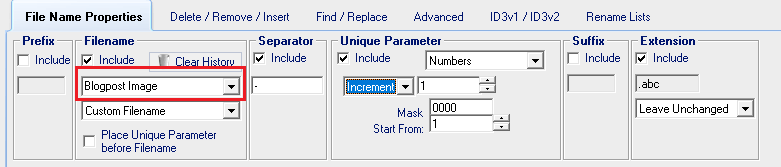
The File Name Properties allow you to change the file name in a format of your choice. Here you can see options like Prefix, Filename, Separator, Unique parameter, and Suffix. These are the attributes of a file name and with File Renamer Basic, you can alter these attributes per your choice.
Let’s start with Prefix. Change the prefix to whatever you want. For example, if it’s a doc file, you can add Doc as a prefix or in case of image files, it can be IMG. You can just choose to not have a prefix for your file name. In this example, let’s choose to exclude Prefix from our file name.

If you notice, the Include button in the prefix column is unmarked. Leave it as it is to exclude the Prefix from your bulk renaming of files.
Step 3: Change Filename
The File Name column would be set to default Leave Unchanged button. You can change the option to anything else in the drop-down menu, Let’s choose our own custom file name in this case.

The files that we chose to rename were images for a blog post

So, the filename here can be, Blogpost Image.
Step 4: Choose a Separator.
You can choose a separator to space up the words; again, you can choose to not include a separator. Leave it blank if you want a simple space. In this case, an underscore would be more preferable.

Step 5: Choose a Unique Parameter
Since in batch renaming, the file name for all the file would remain the same, there is a need for a unique parameter to distinguish them from one another.

You can choose from the three options; numbers, letters, or dates. Here, the default setting is number and it’s better to keep it that way.
Step 6: Choose Suffix and Extension
The Suffix is not necessary to include. So, let’s omit that from the file name. However, one must choose the right extension to define the file type. You can customize the file extension just as you customized the filename.

Since it’s all images we are renaming, the extension could be .jpeg, .png. or .jpg.
Step 7: Preview and Apply
File Renamer allows you to preview the file names before you permanently apply the settings.

The Preview and Apply buttons are in the bottom right corner of File Renamer Window. Once previewed and checked, you can select Apply button and then check the original folder for final review.

The New Name column would look like this once you’ve applied the settings permanently.
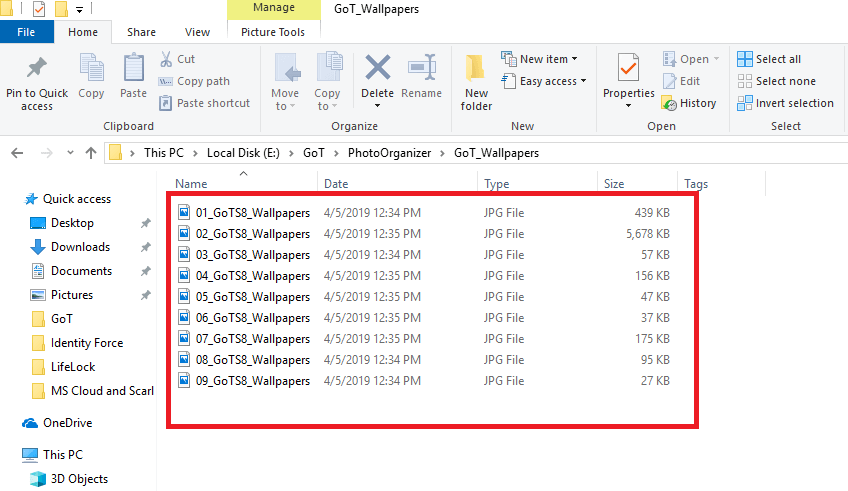
When you go to the original folder now, you’ll see all the files batch renamed successfully.
4. Using Format-Specific Tools
There are a number of batch file renaming software available on the web to bulk rename your files for organizing folders. A lot of them support only a single format of the file for bulk renaming. For example, the software may only batch rename files in .jpeg format or .txt format.
One of the best photo renaming software for Windows 10, 8, and 7 is Photo Organizer. Photo Organizer is a utility tool software, which allows you to scan and organize all the scattered images across your system and help you organize them all via a single window. Apart from helping you delete duplicate photos; a unique feature of this tool is to batch rename the image files that you wish to locate easily for any future use. Let’s rename some files

Step 1: Run Photo Organizer
You can install Photo Organizer here. Once it’s installed. Just run it and you’ll see an option, Import Photos on the top left corner. Click on it and proceed to the next step.

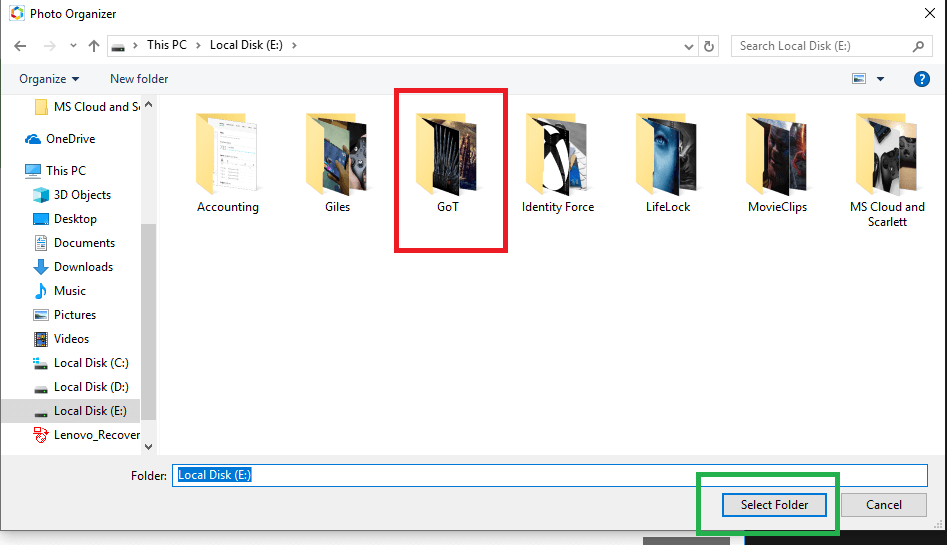
Step 2: Add Folder which contains all the files you need to batch rename.
Once you click on Import Windows, a window would pop up that would ask you to add the folder which contains the files to be batch renamed. Click on Add Folder and browse it from the Explorer

Once Explorer pops-up, and select the desired one.
Step 3: Change your preference to File Name
Once you move to the next step and come to Organize Settings, you would land upon Destination Folder Settings. Change your preference to File Name before you click on next button because that is what we are here to do. Take a look at this screenshot direct from the app.

Step 4: Customize and modify the pattern for the file names
Photo organizer would give you multiple formats for batch renaming for files. Click on customize button and you can then batch rename your files as per your choice.
Once you click on the Customize button, you need to select one format from the choices before giving it a name. So, let’s select one format, <Image Number> and then enter the name that would represent the selected files.

So, that’s the name we have entered there for batch renaming the files in the selected folder. You can see since the selected prefix format is <Image Number>, the name starts with a number and then in the second column, we have entered the desired name.
Step 5: Either move the renamed files or copy them
In the next window, you can choose to either make copies of existing files with new names or can just move the files to a different folder without making copies.

Step 6: Keep Clicking “Next”
Keep clicking next until you’re redirected to the original Photo organizer Window
Now, once that’s done, go to the original album folder on your PC where the images were originally stored; there you’ll see a new Photo Organizer Folder instead of the original files. When you open it, you can see, all the files are renamed as per the format you gave them.
Since Photo Organizer is an organizing tool, it has a lot of features in it, from removing duplicates to album making. So, these steps would only rename your image files. For more, just download and explore it.
So, now you have different means to batch rename the files in your system. Two of them with pre-installed Windows features, and you got to know about an additional tool that can actually offer much more than just batch renaming image files. The only thing with batch renaming of files is that you can’t give character -specific uniqueness, or say, completely unique names to all the files. And it’s important that all the files to be renamed are in the same folder.

 Subscribe Now & Never Miss The Latest Tech Updates!